

 In the vast realm of cloud computing, Amazon Web Services (AWS) stands as a titan. As a beginner, navigating this colossal cloud infrastructure may seem daunting, but AWS EC2 (Elastic Compute Cloud) is your ideal entry point. It’s the doorway to creating and managing virtual servers, commonly known as instances, in the AWS cloud.
Are you ready to embark on your journey to the cloud? Let’s take your first step together as we walk through the process of setting up your very own AWS EC2 instance.
Unpacking AWS EC2
Before we dive into the practical steps, let’s unpack what AWS EC2 is all about.
Amazon Elastic Compute Cloud (EC2): EC2 is a web service offered by AWS that allows you to launch and manage virtual servers, known as instances. These instances run on Amazon’s global network of data centers, providing scalable computing power on-demand.
Step 1: Create an AWS Account
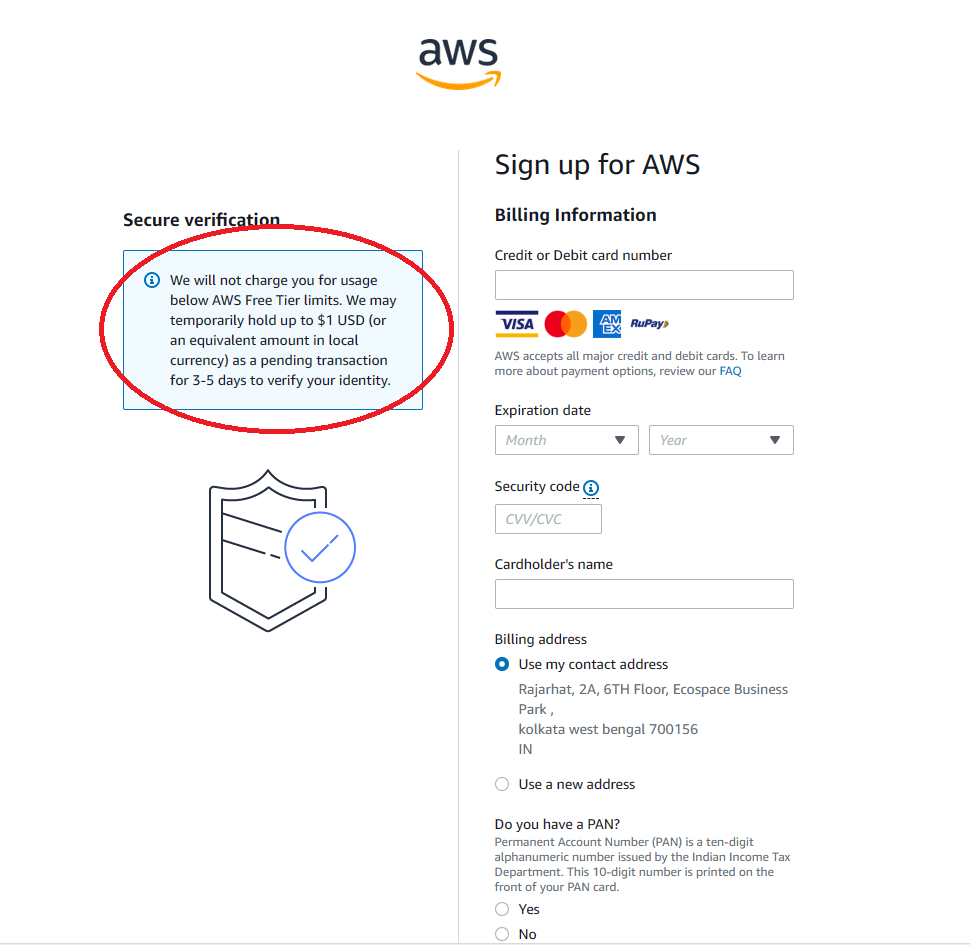
The first step is to create an AWS account if you don’t already have one. Visit the AWS Sign-Up page and follow the prompts to set up your account. You’ll need to provide your contact information and payment details, but don’t worry; AWS offers a free tier with limited resources for the first 12 months, so you won’t be charged immediately.
To open an account in AWS, you need to follow these steps:
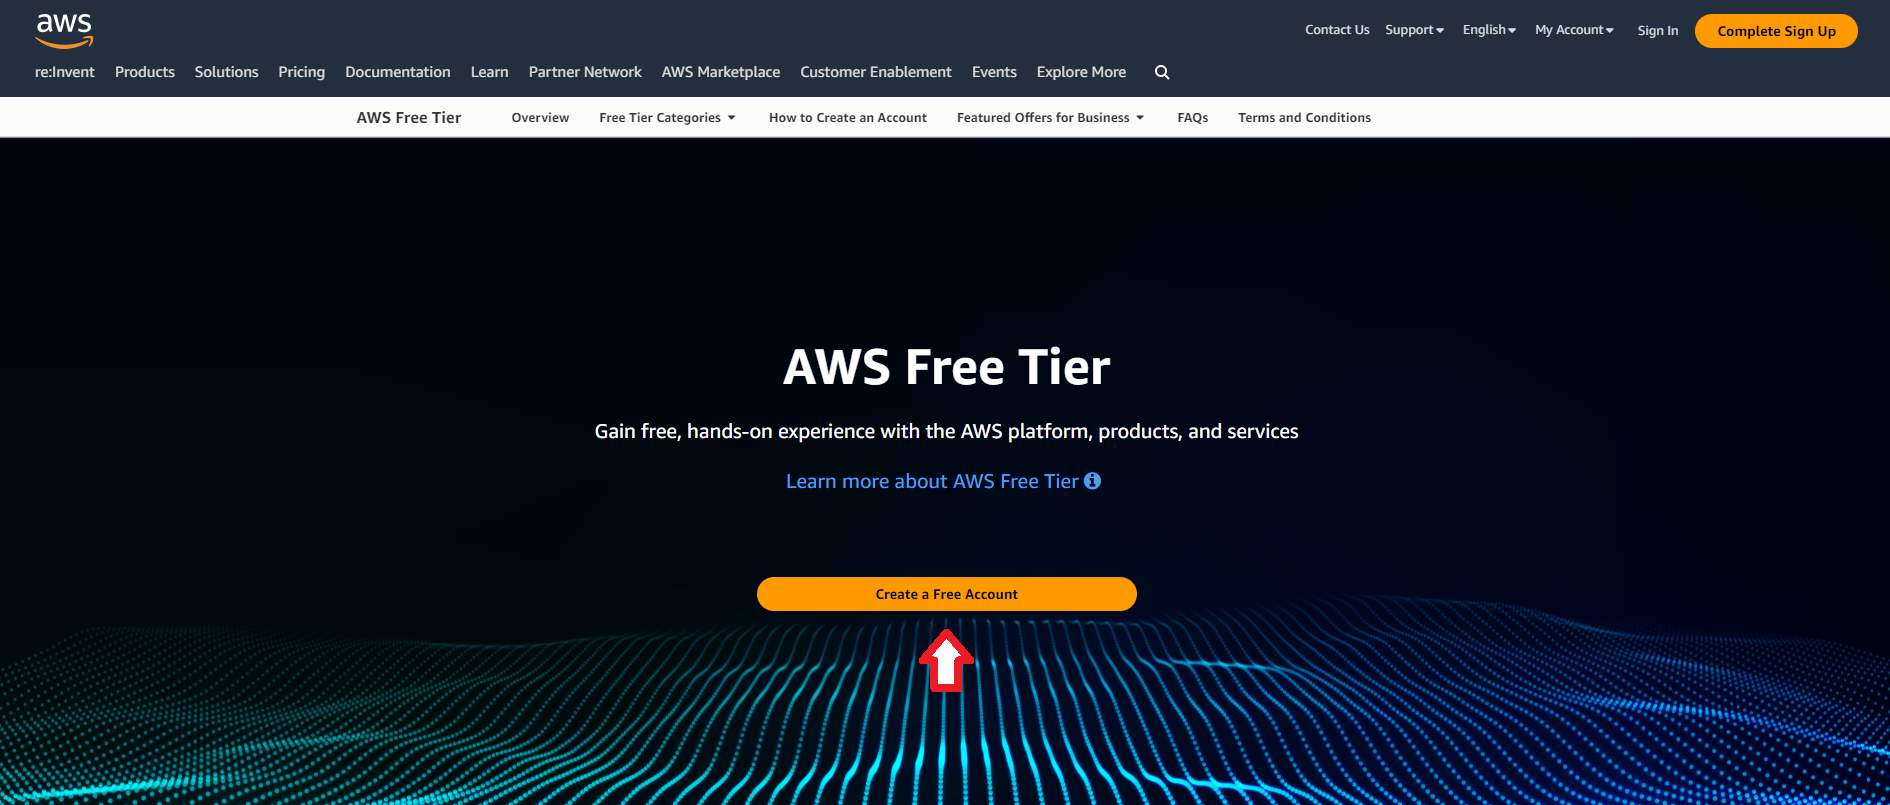
- Open the Amazon Web Services home page [link]
- Choose Create an AWS account
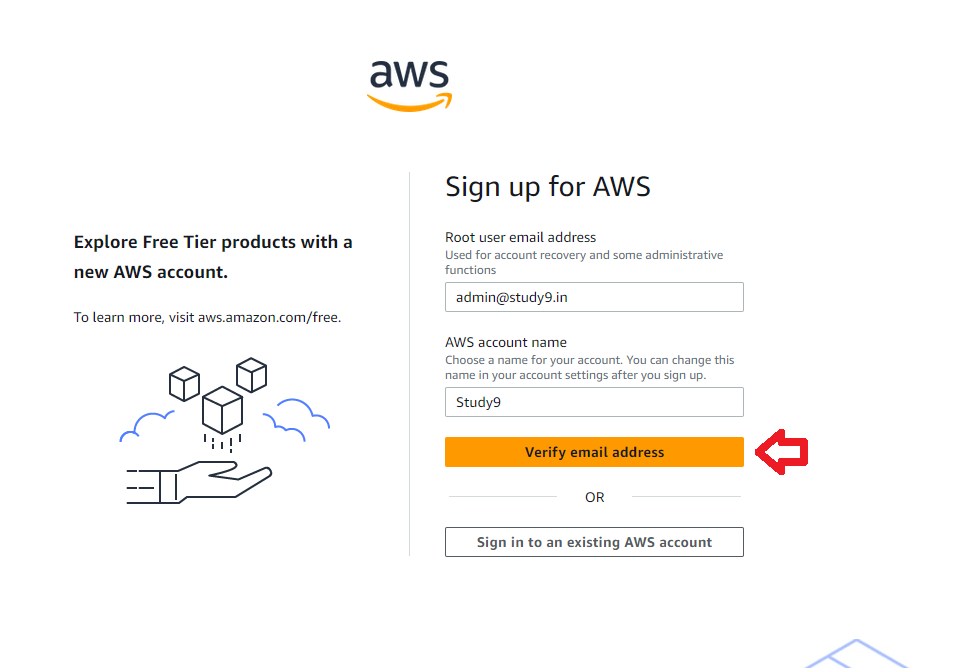
- Enter your account information, such as your email address, password, and account name
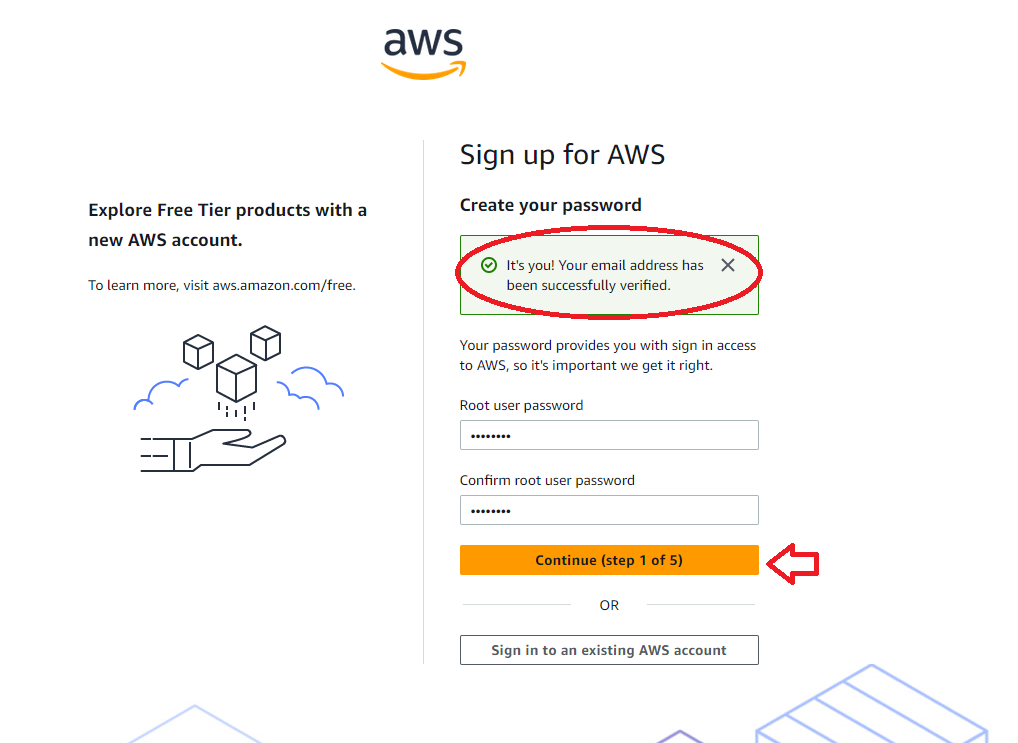
- Verify your email address by entering the code that AWS sends to your email
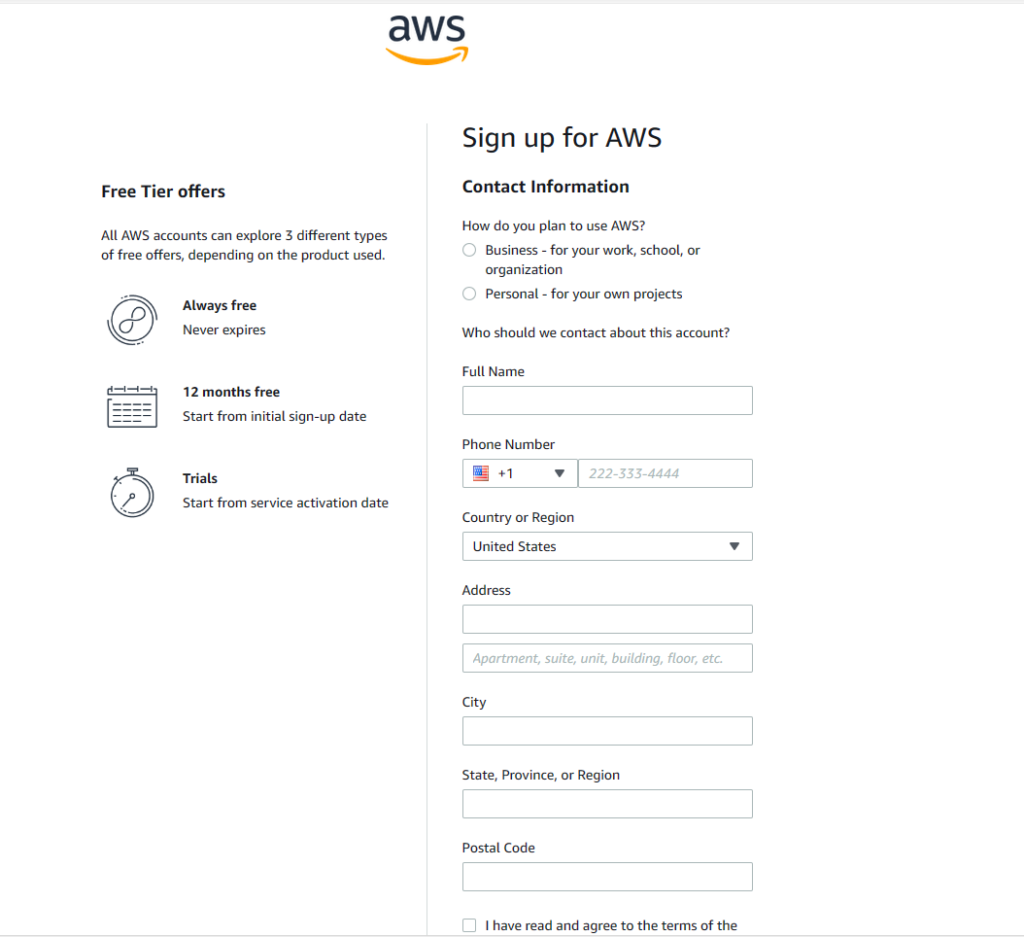
- Choose Personal or Business account type, and enter your company or personal information
- Read and accept the AWS Customer Agreement
- Choose Continue
Step 2: Accessing the AWS Management Console
Once your AWS account is set up, you can access the AWS Management Console, which is your control center for managing AWS services.
- Go to the AWS Management Console.
- Click the “Sign in to the Console” button.
- Enter the email address and password you used to create your AWS account.
- When you first sign in, you see the Console Home page like this :-

Step 3: Launch an EC2 Instance
Now that you’re inside the AWS Management Console, let’s launch your first EC2 instance.
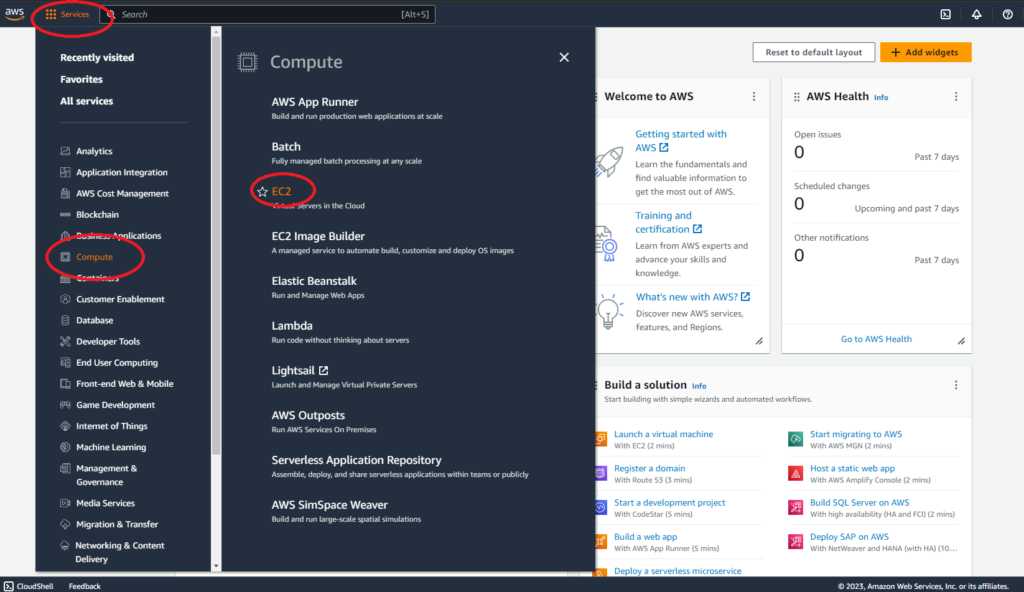
- In the AWS Management Console, locate the “Services” menu at the top and click “EC2” under the “Compute” section.
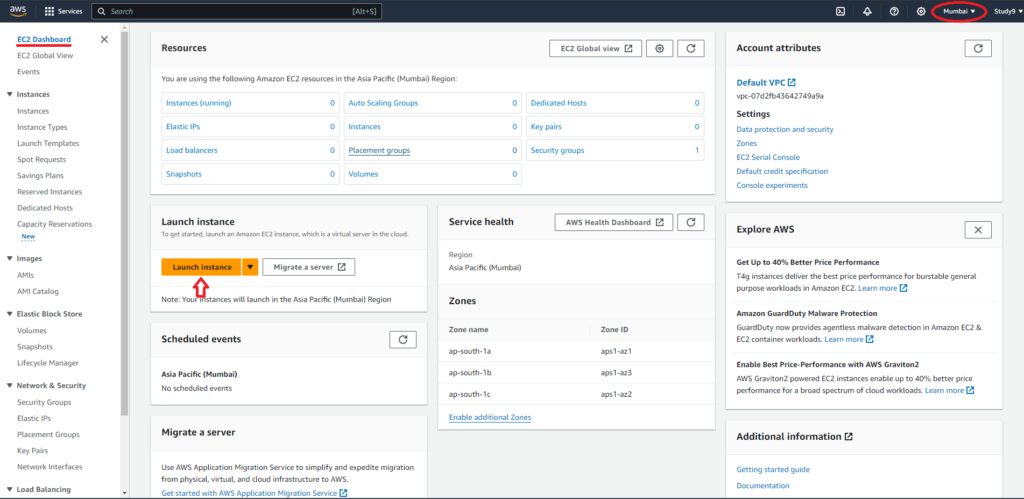
- In the EC2 Dashboard, click the “Launch Instance” button.
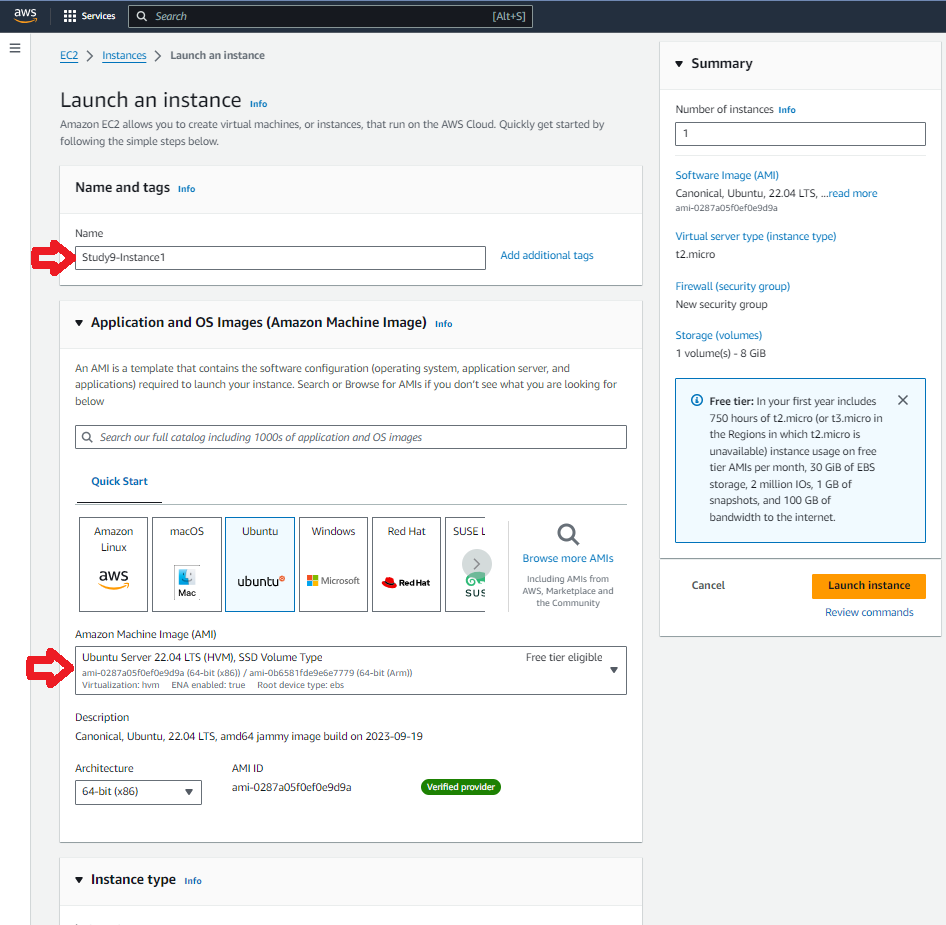
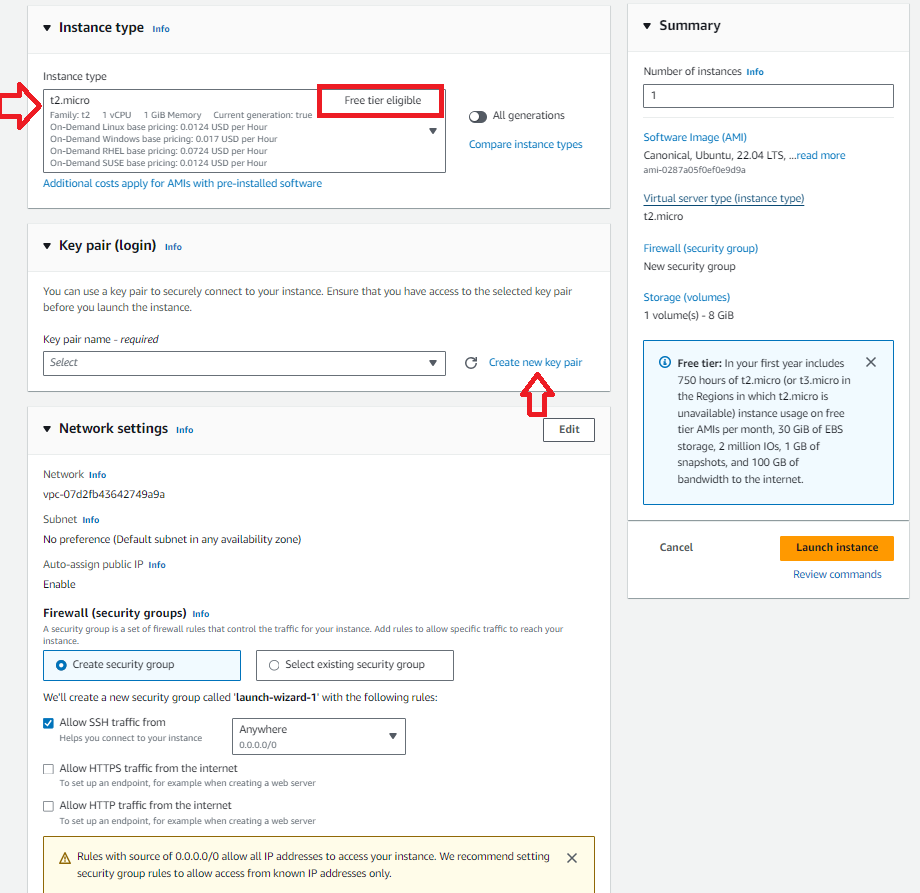
- Choose an Amazon Machine Image (AMI): This is essentially the operating system for your instance. You can select from various options, including Amazon Linux, Ubuntu, or Windows Server. We choose Ubuntu Server 22.04 which is Free tier eligible, and click on it to “Select.”
- Choose an Instance Type: AWS offers a variety of instance types optimized for different workloads. The “t2.micro” instance, which is part of the AWS Free Tier, is an excellent choice for beginners.
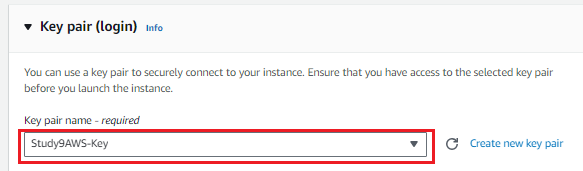
- Create a Key Pair: A key pair is used for securely connecting to your instance. You can either choose an existing key pair or create a new one. To create a new key pair, select “Create a new key pair,” give it a name, and click “Download Key Pair.” Store the private key file (.pem / .ppk) in a secure location, as you’ll need it to connect to your instance. For Mac and Linux (OpenSSH) use
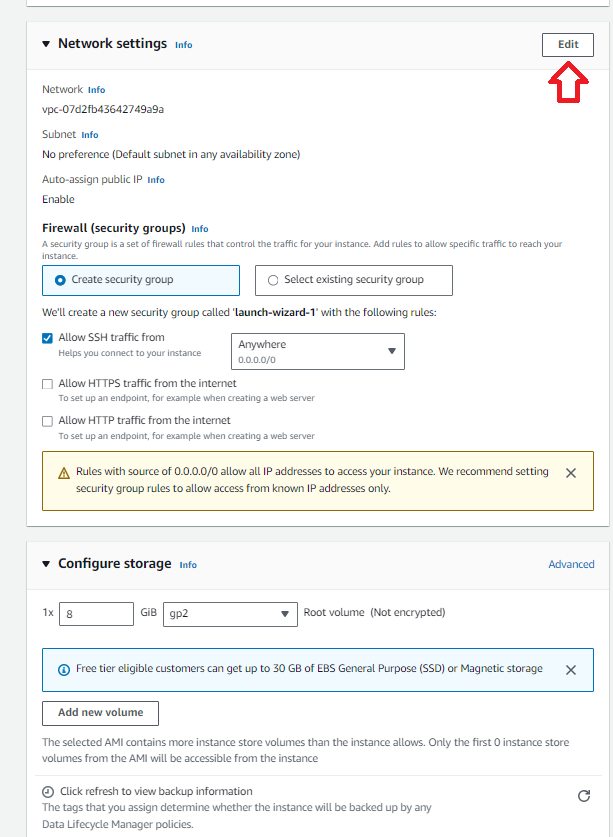
.pemfor Windows (PuTTY) use the.ppk(PuTTY Private Key). - Network Settings : In this step, you can stick to the default settings. Ensure the default subnet is selected (usually named “Default subnet in any availability zone)”), and leave other settings as they are.
- Configure Security Group: Here, you can either select an existing security group or create a new one. For simplicity, you can choose the default security group.
- Add Storage: Here, you can specify the amount of storage you need for your instance. The default settings are usually sufficient for getting started.By default, it’s often set to “gp2” (General Purpose SSD), which is suitable for a wide range of workloads. Example: 1 x 8 GiB gp2. The root volume (the primary volume where the operating system and applications are installed) is typically not encrypted . In the upcoming AWS blogs we will discuss, specific security or compliance requirements, you might want to explore encryption options for your EBS volumes. However, for this introductory scenario, the default unencrypted setup is sufficient.
- Add Tags (Optional): Tags are labels that help you organize your AWS resources. You can skip this step for now
- Review and Launch: The summary section provides an overview of your instance configuration. Double-check your settings, and when you’re ready, click “Launch.


Step 4: Accessing Your EC2 Instance
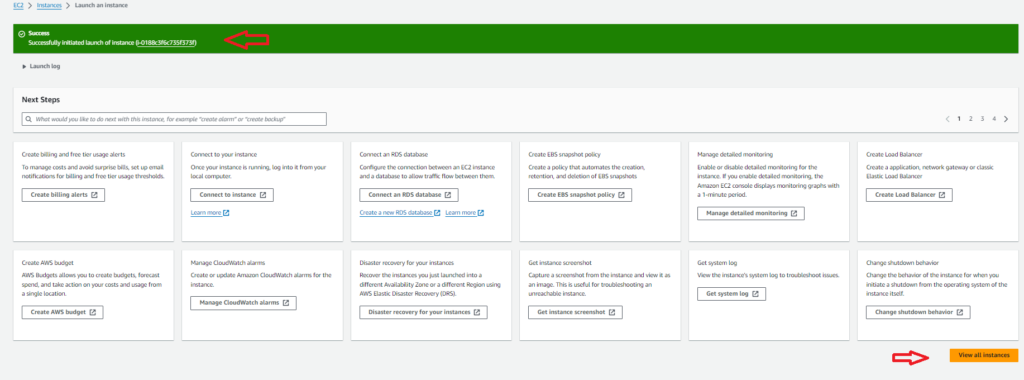
Congratulations! You’ve successfully launched your first AWS EC2 instance. Now, let’s access it.
- In the EC2 Dashboard, locate your newly created instance. You’ll see its status as “running.”
- Select the instance by checking the box next to it.
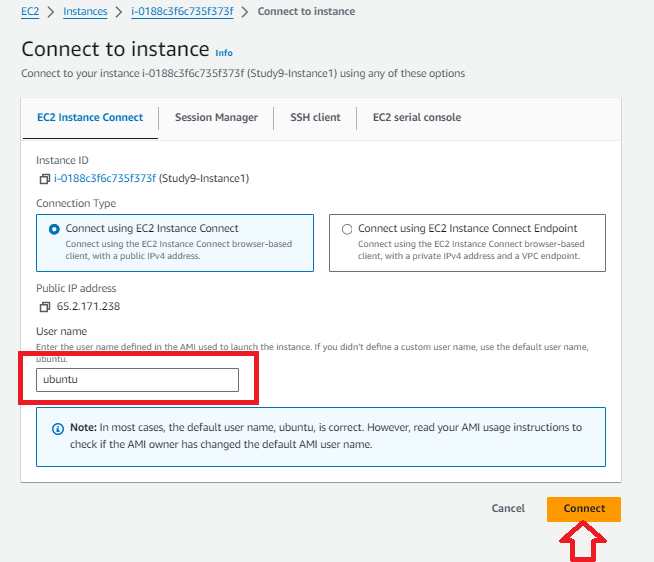
- At the top of the page, you’ll see a button labeled “Connect.” Click it to reveal connection instructions.
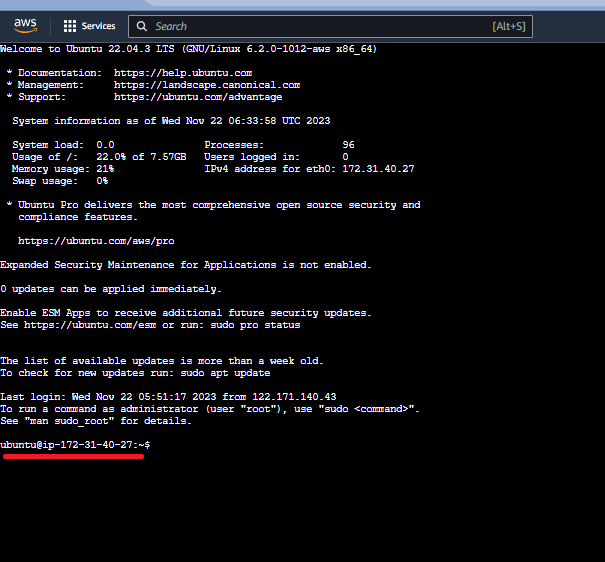
- Follow the instructions provided to connect to your instance using SSH. For example, you can use the Terminal on macOS/Linux or a tool like PuTTY on Windows.
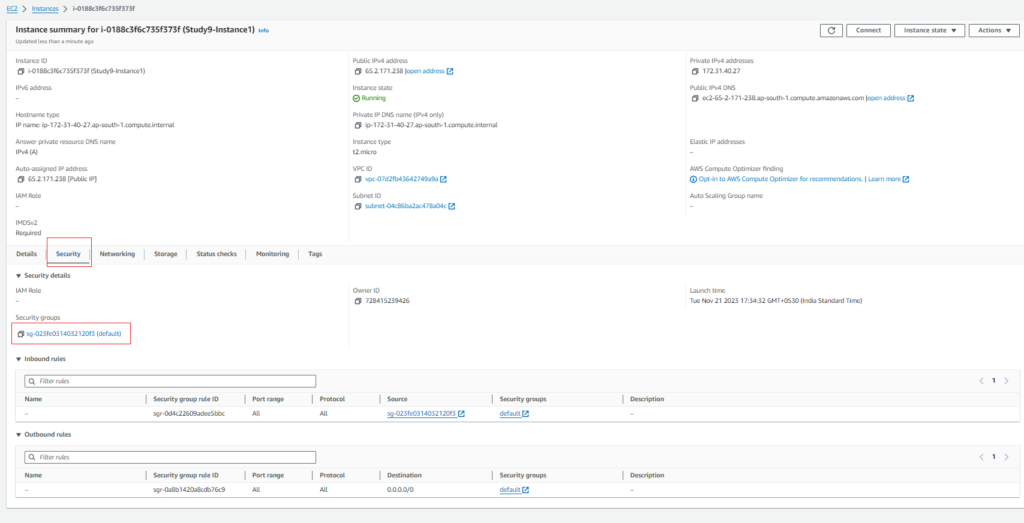
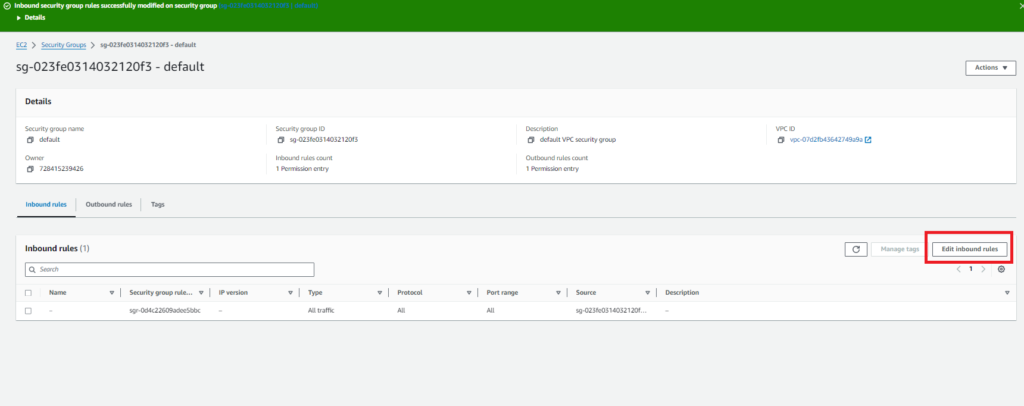
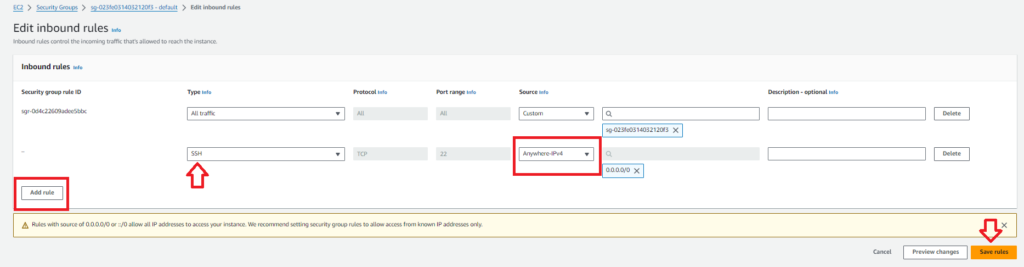
- Ensure that the security group associated with your instance allows incoming SSH traffic from your IP address. The default security group for the VPC does not allow incoming SSH traffic by default. For steps to add a rule for inbound SSH traffic to your Linux instance, see screenshots below.

What’s Next?
Congratulations! You’ve successfully launched your first AWS EC2 instance. You’re now ready to explore the vast world of Amazon Web Services and all the incredible possibilities it offers.
But remember, AWS is just one piece of the cloud computing puzzle. To truly harness the power of the cloud, consider diving deeper into cloud services and mastering the art of multi-cloud management. Our upcoming Multi-Cloud Hands-On Training course is the perfect next step.
In this course, you’ll not only gain advanced knowledge of AWS but also explore Azure and Google Cloud Platform (GCP). We’ll guide you through real-world use cases, scenario-based approaches, and hands-on projects that cover all features of these leading cloud providers.
Don’t miss this opportunity to become a cloud computing expert. Stay ahead in the rapidly evolving tech industry by enrolling in our Multi-Cloud Hands-On Training today.
Stay connected for more exciting updates, and happy cloud computing!
