

Docker Hub is the official online repository for Docker images, providing developers with a centralized platform to store, share, and manage Docker container images. Whether you’re deploying applications locally or in the cloud, Docker Hub simplifies the process of accessing and managing container images. In this quickstart guide, we’ll walk through setting up Docker Hub, pulling and pushing images, and integrating it into your workflow.
Table of Contents
- Prerequisites
- Setting Up Docker Hub
- Exploring Docker Hub
- Pulling an Image from Docker Hub
- Creating and Pushing a Custom Image
- Managing Images on Docker Hub
- Hands-on Project : Integrating Docker Hub in Your CI/CD Pipeline with Github Actions.
1. Prerequisites
To get started with Docker Hub, ensure you have:
- Docker installed on your machine. Download Docker if not already installed.
- A Docker Hub account. Sign up for Docker Hub if you don’t have one.
To check if Docker is installed on your machine, you can run a simple command in your terminal or command prompt:
docker --versionStart Docker Desktop : If you’re on Windows, Docker often runs through Docker Desktop. Check if Docker Desktop is installed and running.

2. Setting Up Docker Hub
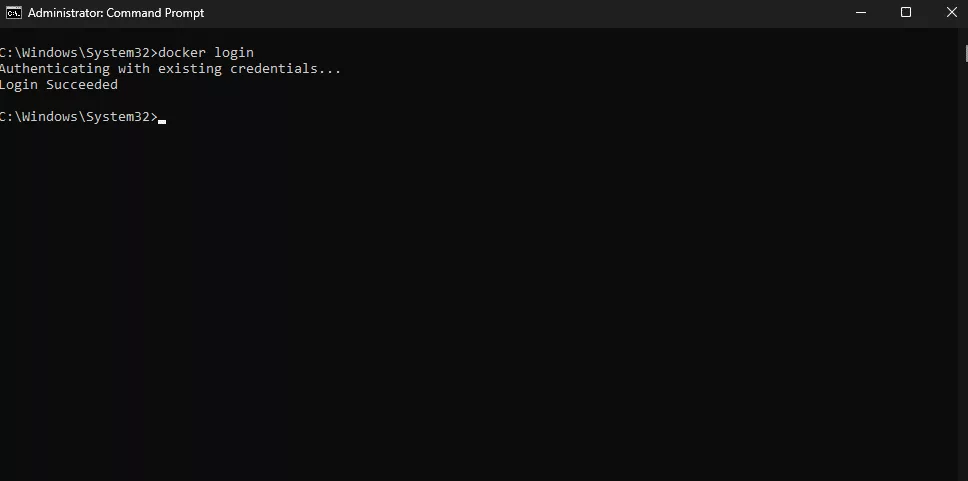
- Login to Docker Hub
To start using Docker Hub from the command line, log in to your account with the following command:
docker loginEnter your Docker Hub username and password when prompted.
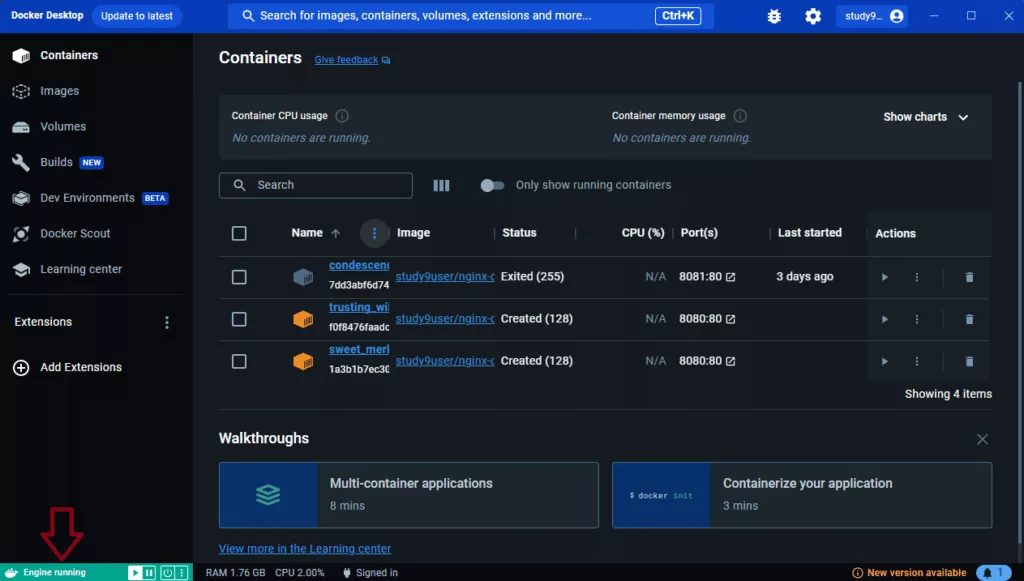
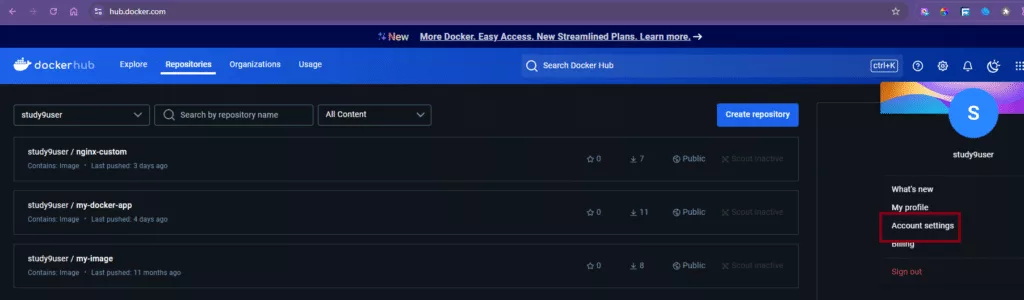
- Explore the Dashboard
After logging in, you’ll be able to see your repositories, organization settings, and account details on your Docker Hub dashboard.

3. Exploring Docker Hub
Docker Hub hosts a vast collection of images, including official images for popular software like nginx, mysql, redis, and more. You can browse or search for these images directly on Docker Hub’s website, or use the CLI:
For example:
docker search nginx

This command will list several versions and variations of nginx available on Docker Hub, including the official image.
4. Pulling an Image from Docker Hub
One of the key features of Docker Hub is the ability to pull images directly to your local environment. Let’s pull an nginx image as an example:
Docker will fetch the latest nginx image from Docker Hub and store it locally. You can verify it’s available by listing your local images:
Once downloaded, you can run the nginx container with the following command:
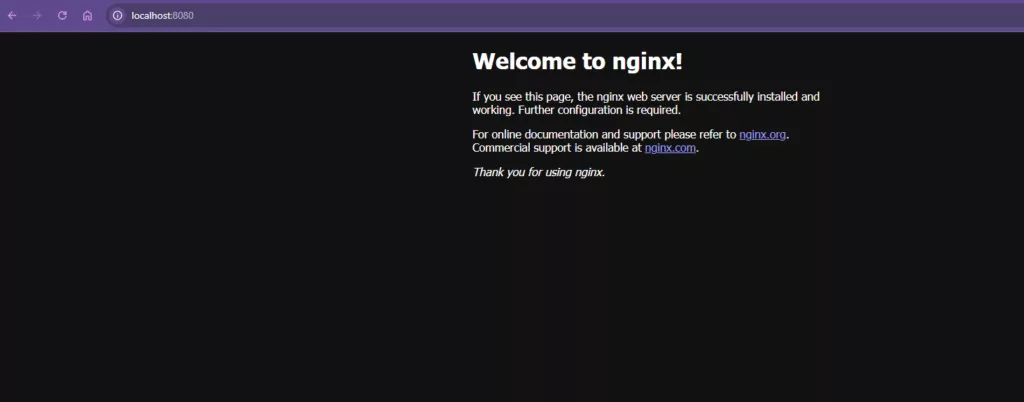
docker run -d -p 8080:80 nginx
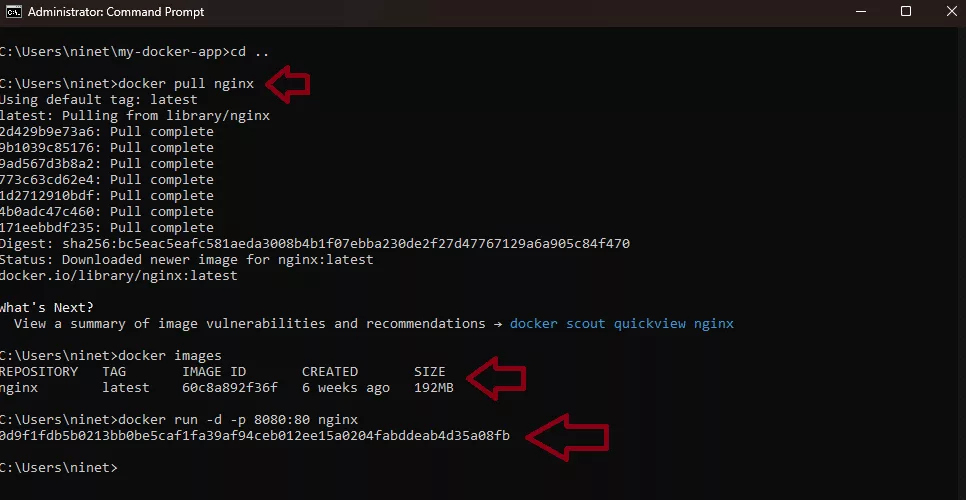
This command will start nginx and map port 80 in the container to port 8080 on your local machine. Visit http://localhost:8080 in your browser to confirm it’s running.
5. Creating and Pushing a Custom Image
You can create, build, and push a custom Docker image to Docker Hub. Here’s a step-by-step guide, including setting up Visual Studio Code (VS Code), which is helpful for writing and managing your Dockerfiles and other project files.
Step 1: Install Visual Studio Code
-
-
-
- Download VS Code from the official site and install it.
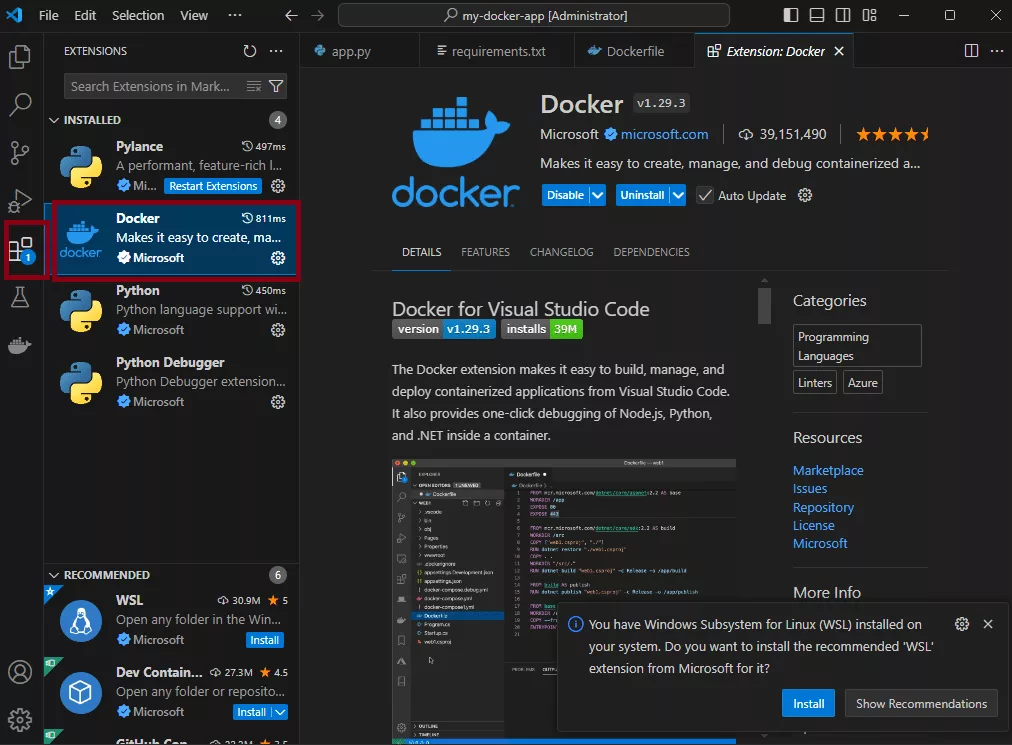
- Once installed, open VS Code and install the Docker extension. Go to the Extensions view (
Ctrl+Shift+X), search for “Docker,” and install it. This extension will make it easier to manage and interact with Docker directly in VS Code.
-
-
Step 2: Create a Project Folder and Dockerfile
-
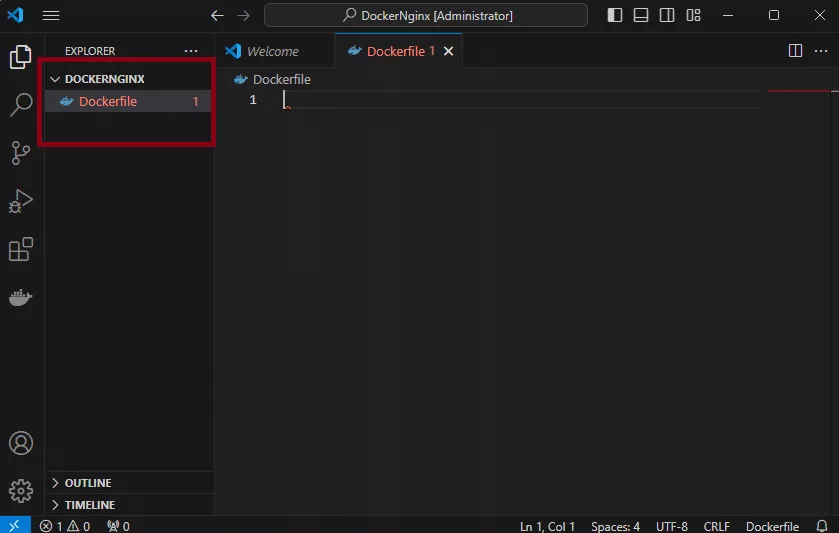
- Open VS Code and create a new folder for your project (e.g.,
DockerNginx). - Inside this folder, create a file named
Dockerfile(no file extension).
- Open VS Code and create a new folder for your project (e.g.,
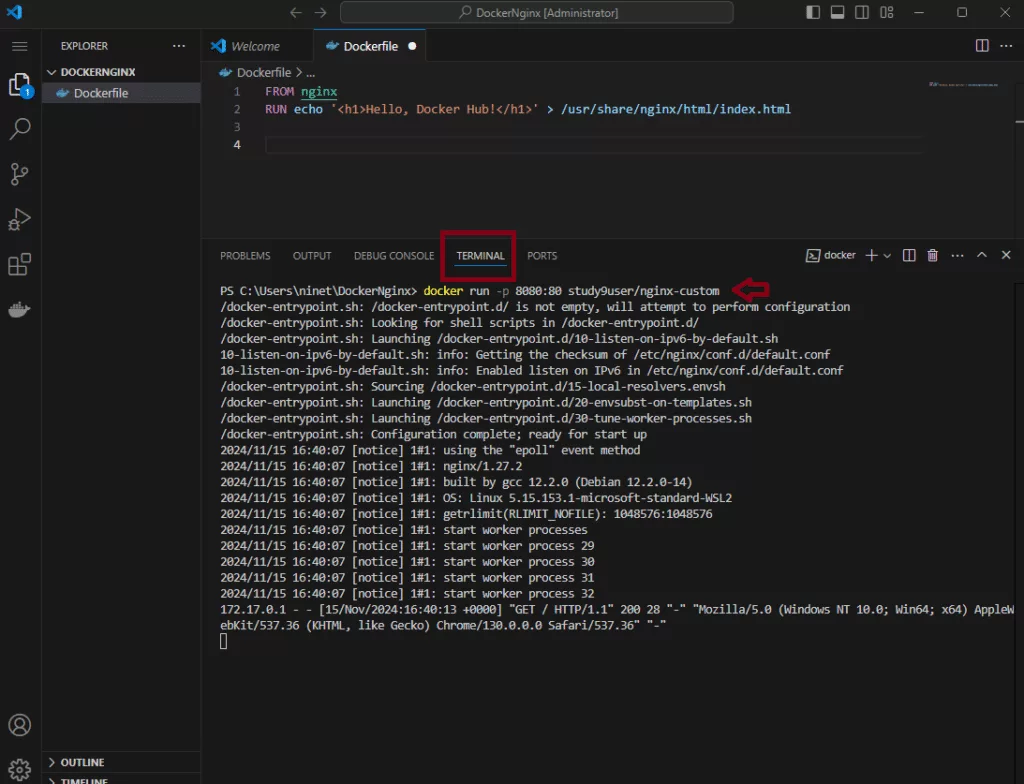
Step 3: Write the Dockerfile
In your Dockerfile, write the following code:
FROM nginx

RUN echo '<h1>Hello, Docker Hub!</h1>' > /usr/share/nginx/html/index.html
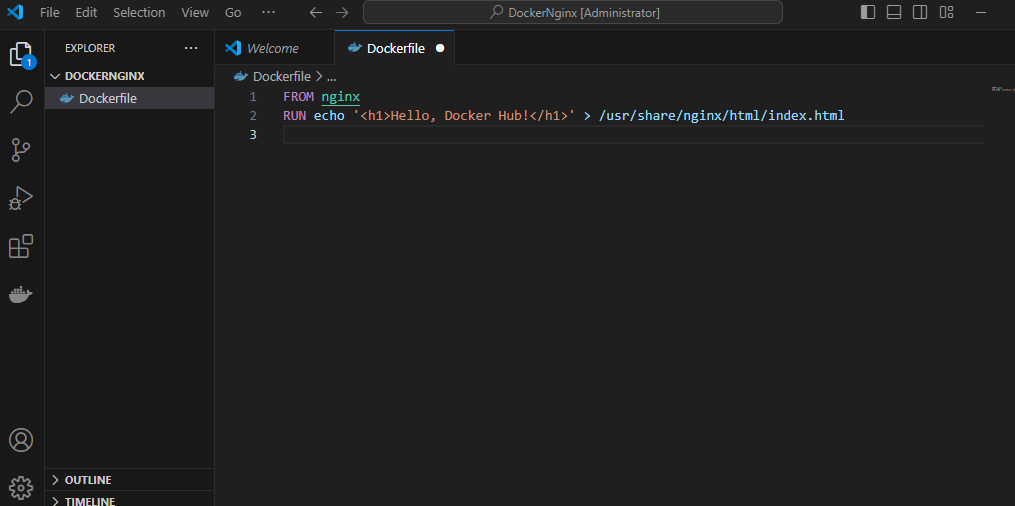
This Dockerfile:
- Pulls the official
nginximage as a base. - Runs a command to replace the
index.htmlfile with a simple HTML file that says, “Hello, Docker Hub!”
Step 4: Build the Docker Image
-
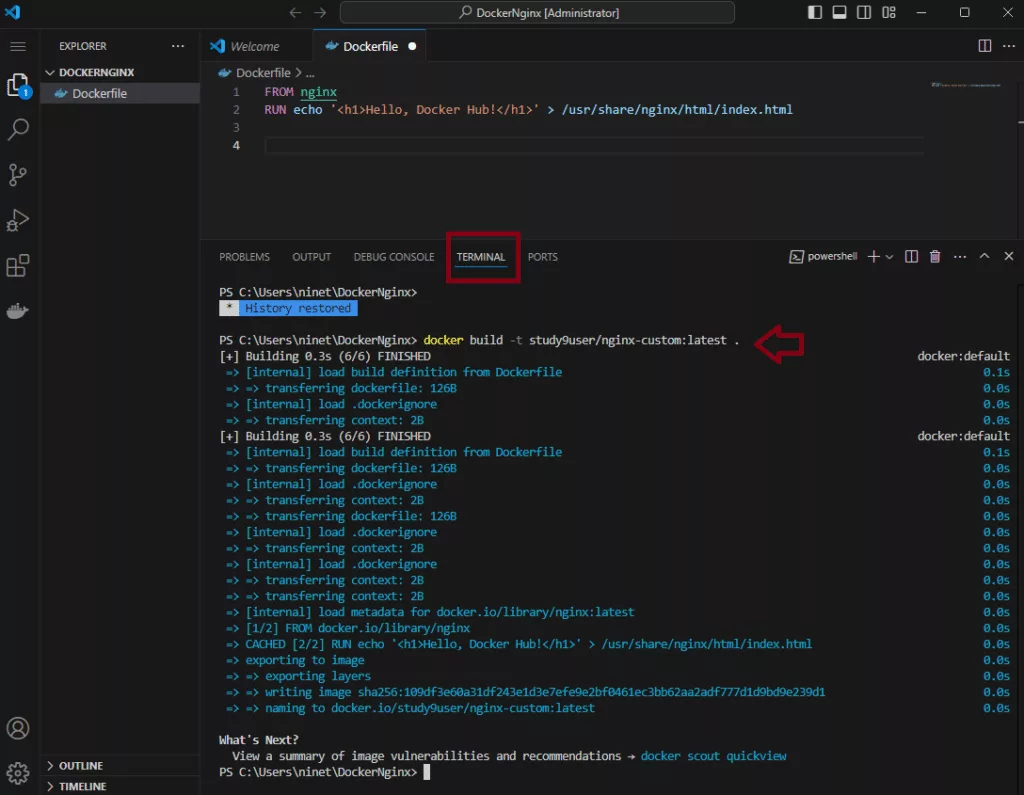
- Open a terminal in VS Code by selecting Terminal > New Terminal.
- Navigate to your project folder (e.g.,
cd path/to/Dockerfile). - Use the following command to build the Docker image:
Replace
your-dockerhub-usernamewith your Docker Hub username. (in our case studynine).
Step 5: Test the Docker Image Locally (Optional)
- Run the image to test it locally:
- Open your web browser and go to
http://localhost:8080. You should see the message “Hello, Docker Hub!”

Step 6: Push the Docker Image to Docker Hub
-
- Log in to Docker Hub from the terminal if you haven’t already:
Enter your Docker Hub credentials.
- Push your image to Docker Hub:
docker push your-dockerhub-username/nginx-custom:latest
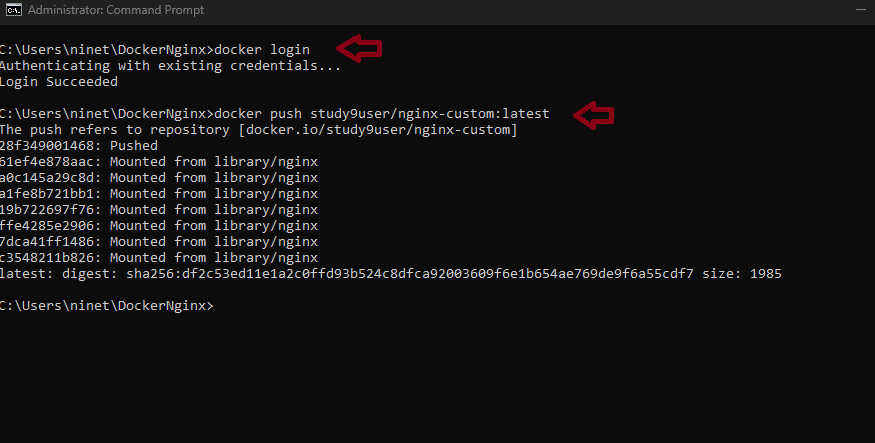
- Once the push is complete, your image will be available on Docker Hub, and you can pull it from anywhere using:
docker pull your-dockerhub-username/nginx-custom:latest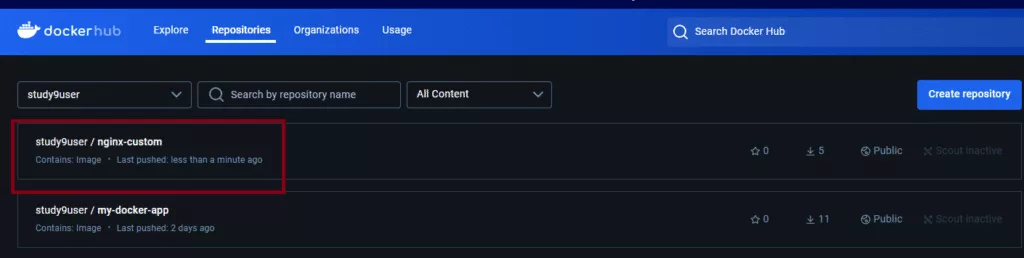
- Log in to Docker Hub from the terminal if you haven’t already:
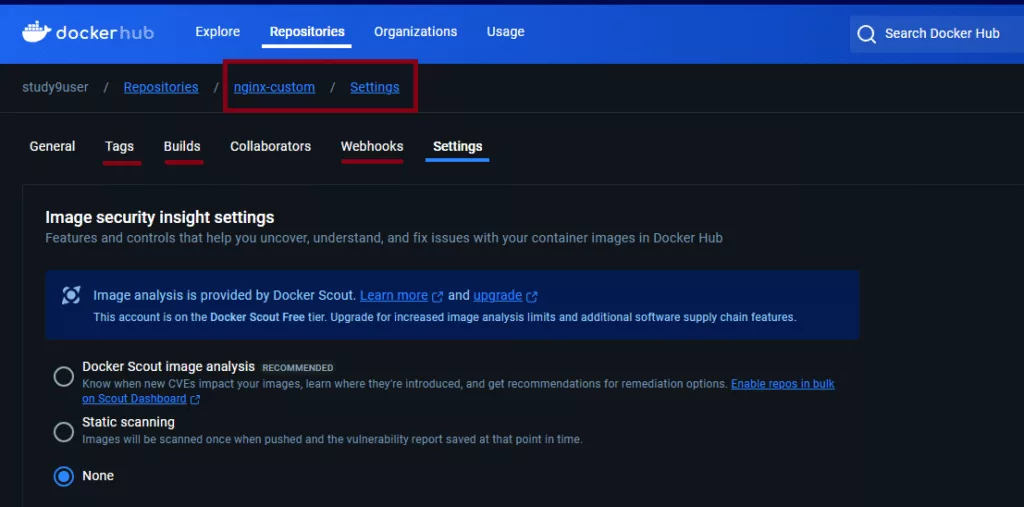
6. Managing Images on Docker Hub
Docker Hub provides tools for managing your images:
- Repository Tags: Version your images by adding tags. For instance,
myapp:1.0,myapp:latest, etc. - Automated Builds: Configure Docker Hub to automatically build images from your GitHub or Bitbucket repositories whenever you push changes.
- Webhooks: Set up webhooks to trigger events whenever an image is pushed or updated.
To access these features, go to your Docker Hub repository and navigate to Settings.
7. Project : Docker Hub CI/CD Integration with GitHub Actions
Docker Hub can seamlessly integrate with CI/CD tools like Jenkins, GitLab CI/CD, and GitHub Actions to automate deployments.
Example with GitHub Actions:
In this hands-on project, we’ll explore how to seamlessly integrate Docker Hub with GitHub Actions to create an automated CI/CD pipeline. By the end of this tutorial, you’ll learn how to:
- Build a Docker image directly from your GitHub repository.
- Automate the process of pushing the image to Docker Hub.
- Keep your Docker Hub repository updated with every code change.
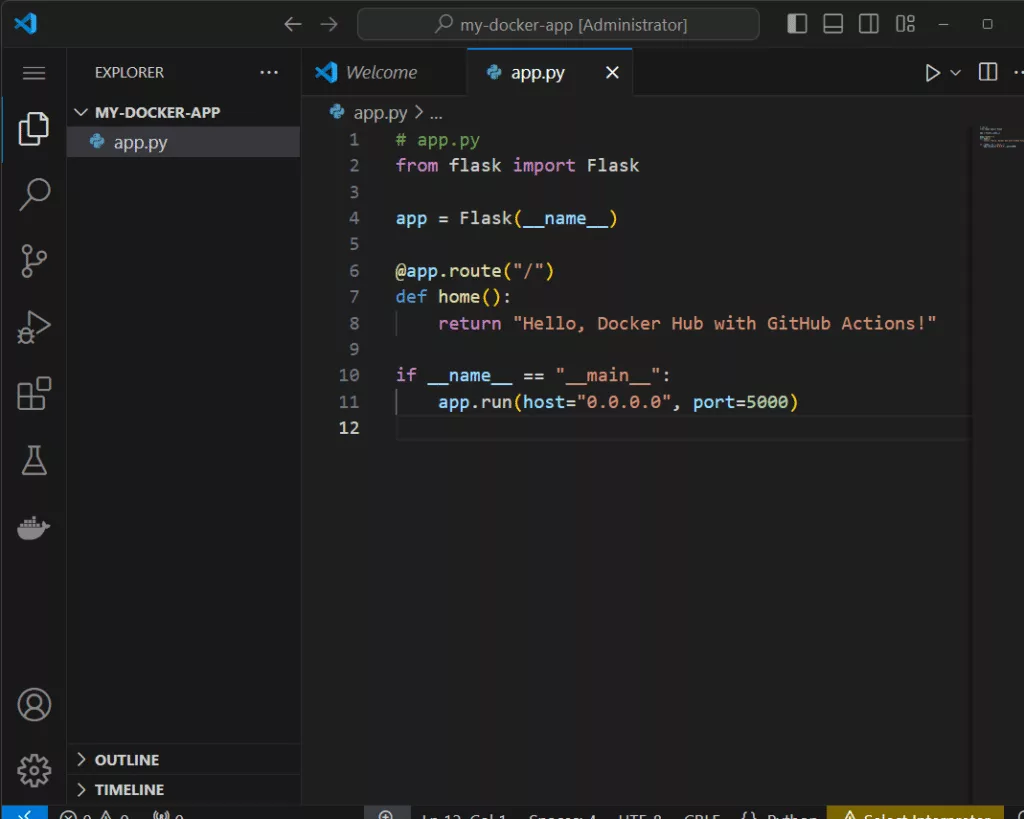
We’ll use a simple Python(Flask) application as an example, but the concepts apply universally to any Dockerized project. . Let’s dive in!
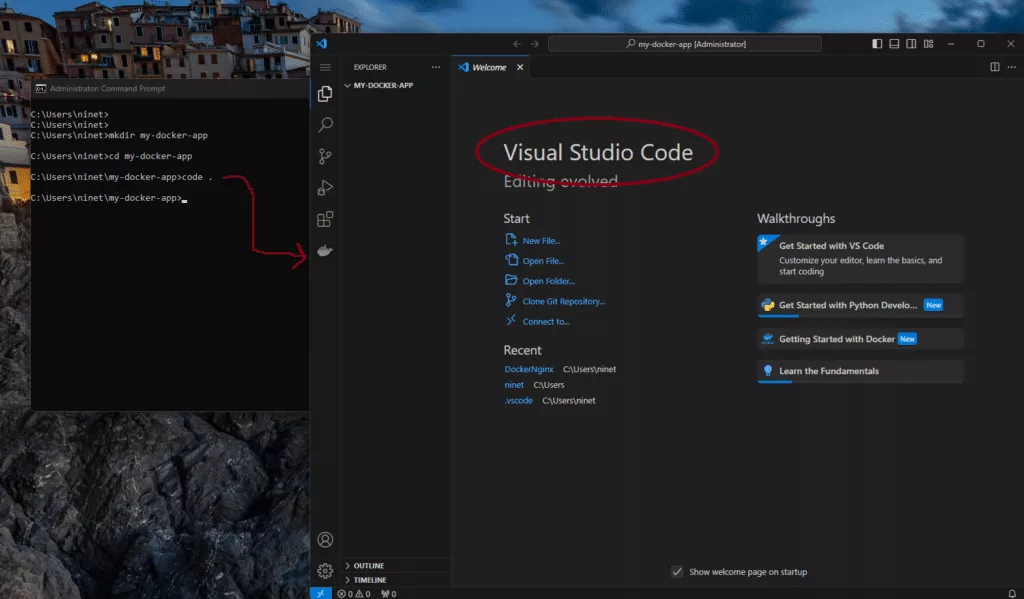
Step 1 : Create a Directory for the Project:
mkdir my-docker-app

cd my-docker-app
Dockerfile directly in VS Code within the my-docker-app folder. To open your project folder in VS Code from the command line (cmd or PowerShell), you need ‘code’ command in PATH .- Run the following command:
The . tells VS Code to open the current directory.
- Create a Basic Application:
- 1st, let’s create a simple
app.pyfile with a minimal Flask application.
- Create a
requirements.txtFile:
-
- This file will list the dependencies needed for the application. Create a
requirements.txtFile:
- This file will list the dependencies needed for the application. Create a
Create a Dockerfile:
- This will define the Docker image configuration for the application.
# Dockerfile

FROM python:3.9-slimCOPY requirements.txt requirements.txt
RUN pip install -r requirements.txt
COPY . .
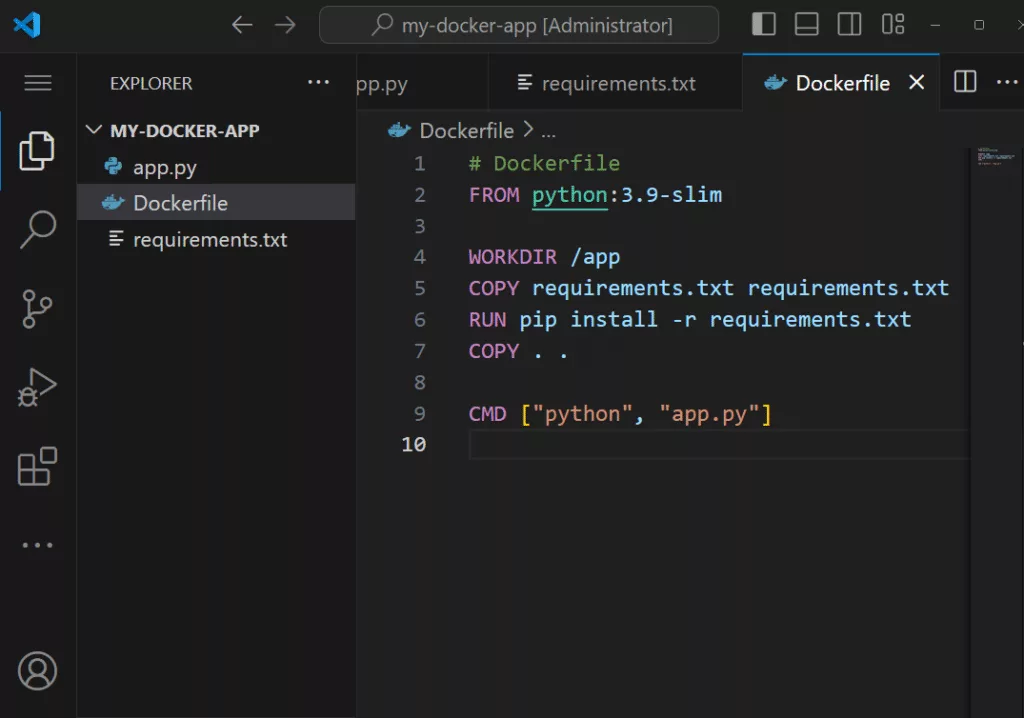
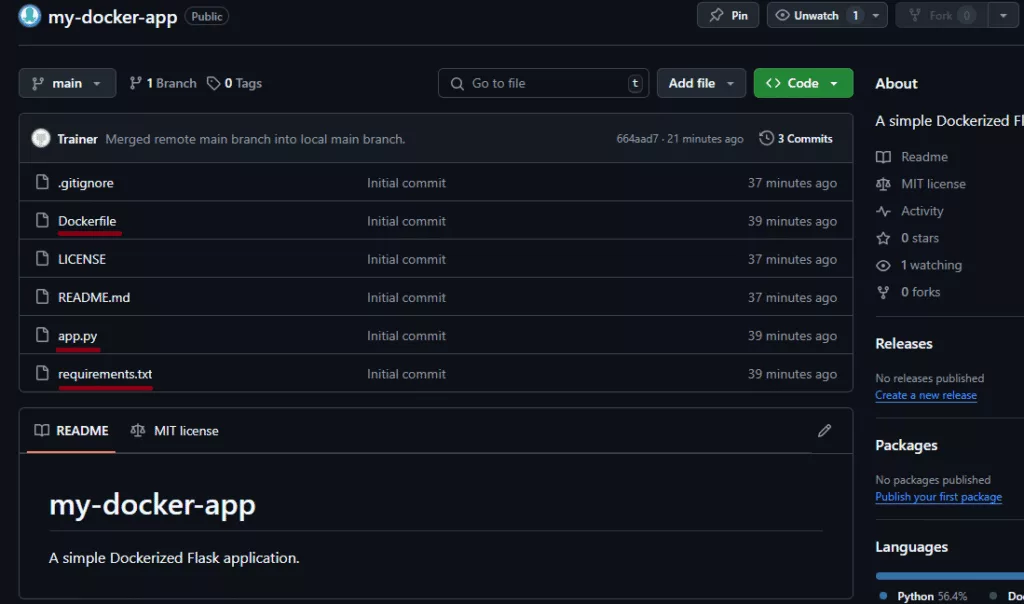
Now, you should have the following files in your my-docker-app folder:
app.pyrequirements.txtDockerfile
Once these are created, you can proceed with the steps for GitHub integration and Docker Hub push.
Step 2: Initialize a Git Repository and Push to GitHub
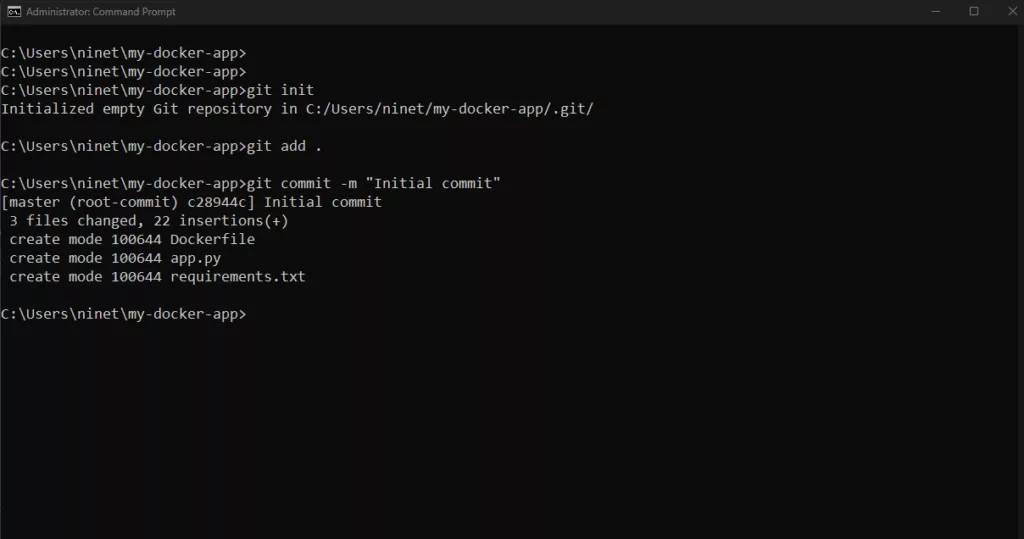
Initialize Git and Commit Files:
git init

git add .

git commit -m "Initial commit"
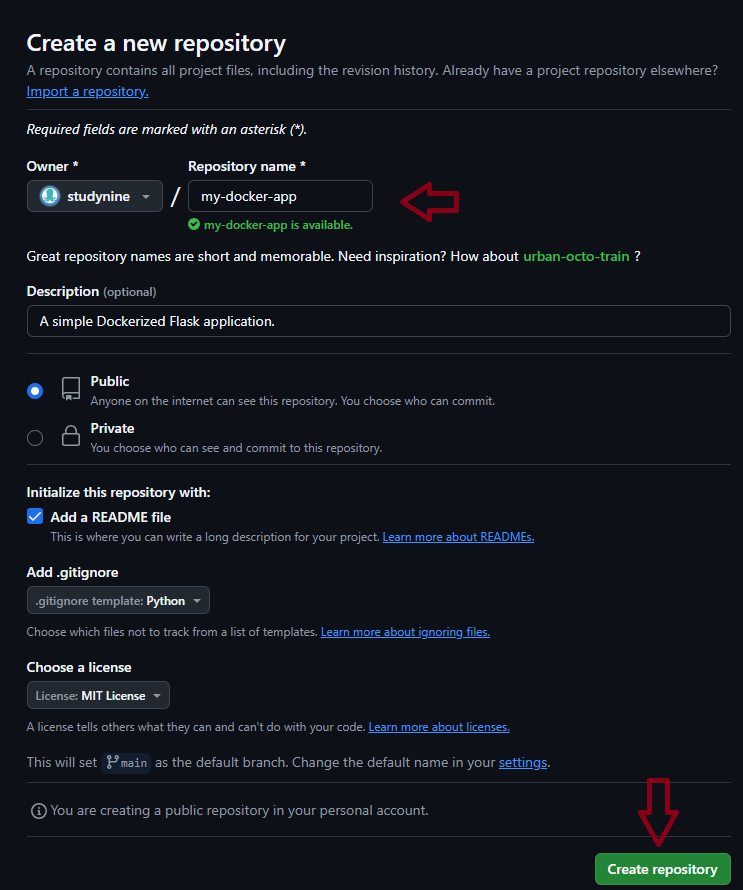
- Create a New GitHub Repository:
- Go to GitHub and create a new repository.
- After creating the repository, make sure the URL
https://github.com/is correct.your-username/my-docker-app.git - Follow the instructions on GitHub to add it as a remote and push your local code.
git remote add origin https://github.com/your-username/my-docker-app.git

git branch -M main

git push -u origin main
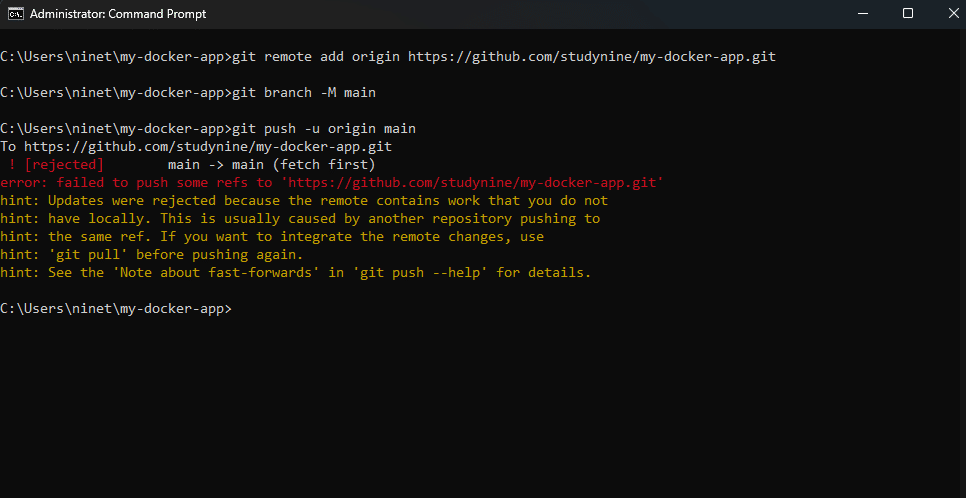 The issue here is that my local branch is out of sync with the remote branch on GitHub because I created the repository with a README or other files (like
.gitignore). This created content in the remote repository that doesn’t exist in my local repository, so Git is preventing the push to avoid overwriting changes.To resolve this , first, run the following command to pull the existing changes (e.g., the README file) from GitHub. The--allow-unrelated-historiesflag allows Git to merge the histories of two branches that don’t share a common ancestor, which is needed here because your local and remote repositories were created independently.Now I’m in “insert mode,” where I am typing a message explaining the merge, like:
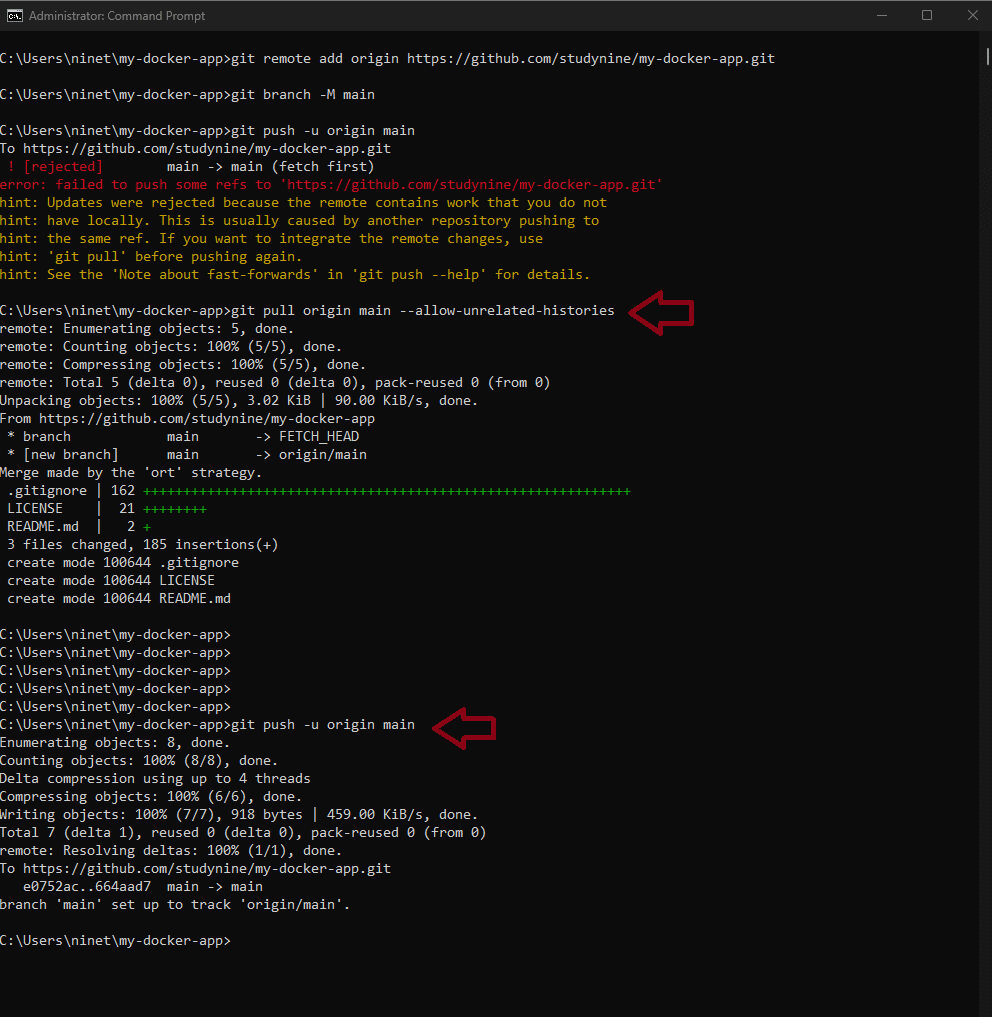
Great! My local repository is now synced with GitHub, and I’m ready to proceed with setting up GitHub Actions for Docker Hub integration.
Step 3: Set Up GitHub Actions to Push to Docker Hub
-
Step 1: Configure Docker Hub Credentials in GitHub Secrets
-
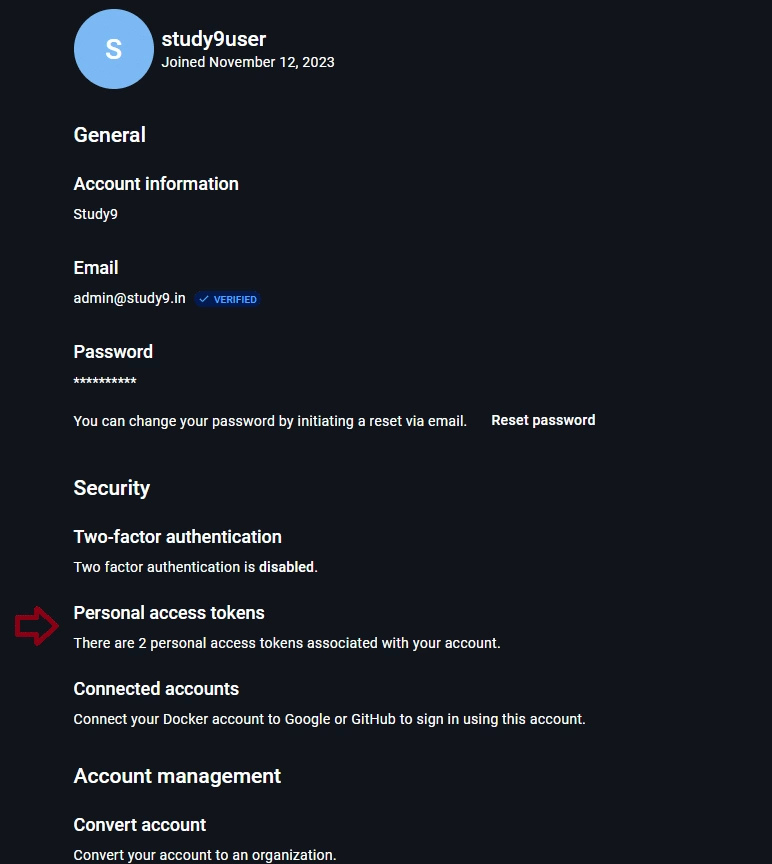
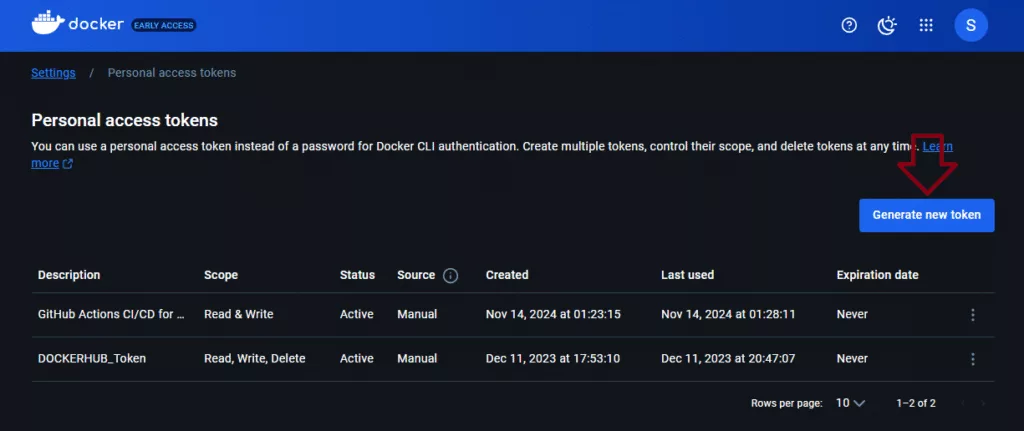
- Generate a Personal Access Token on Docker Hub:
- Go to your Docker Hub account settings.
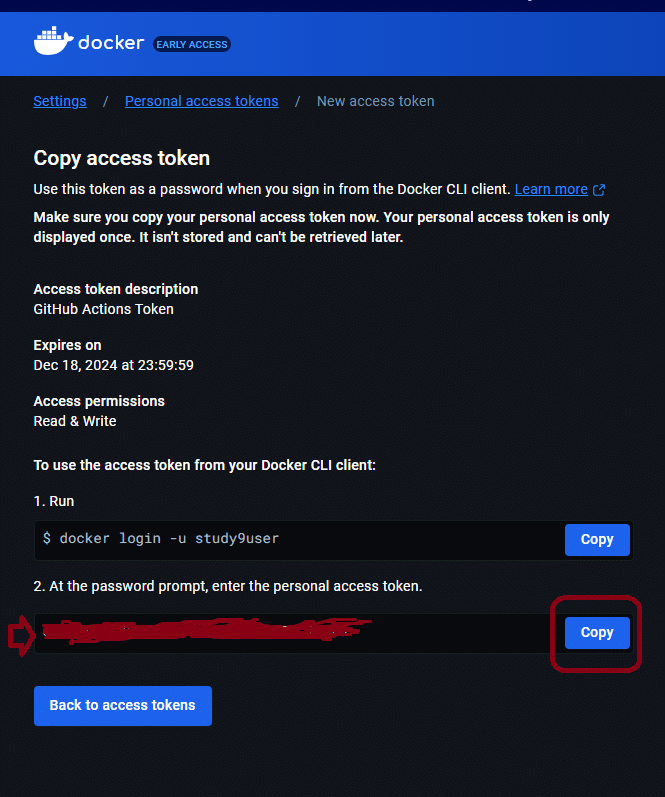
- Under Security, create a new Access Token with a meaningful description and assign it
Read/Writepermissions. - Copy the token immediately.
- Generate a Personal Access Token on Docker Hub:

- Add Secrets to GitHub:
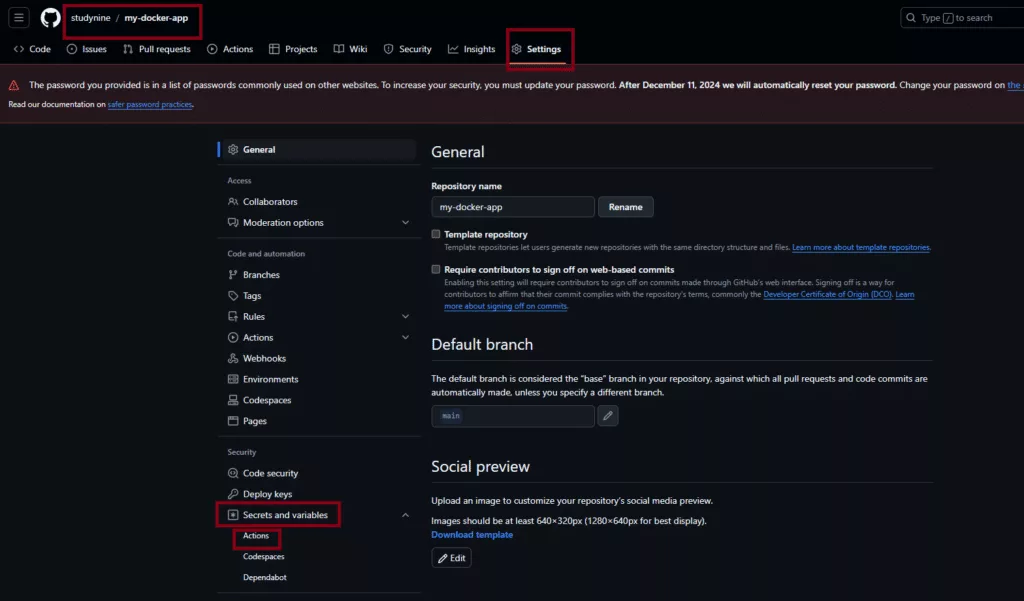
- Go to your GitHub repository.
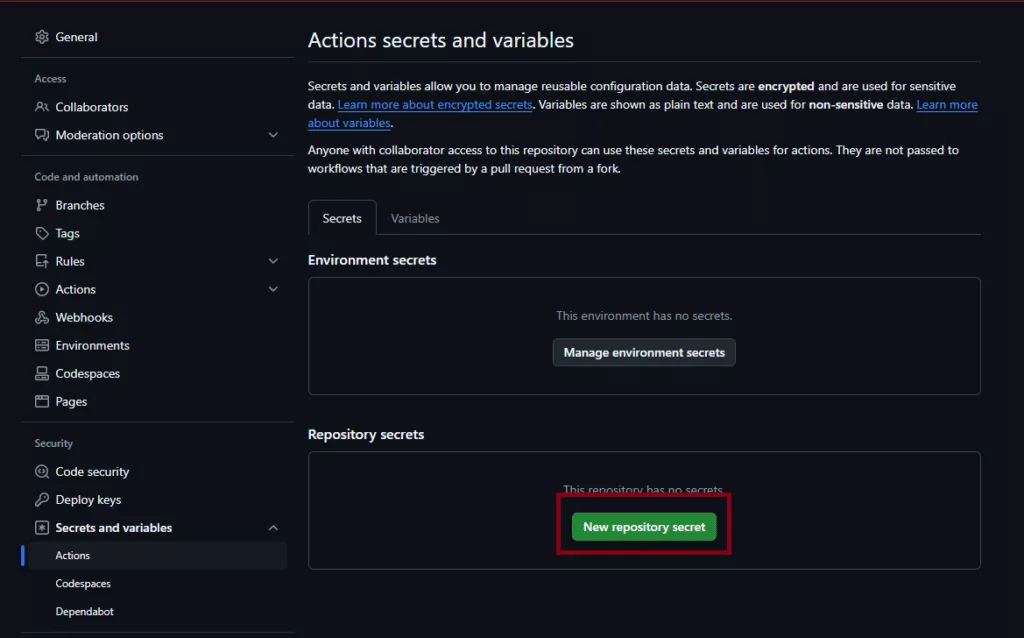
- Navigate to Settings > Secrets and variables > Actions > New repository secret.
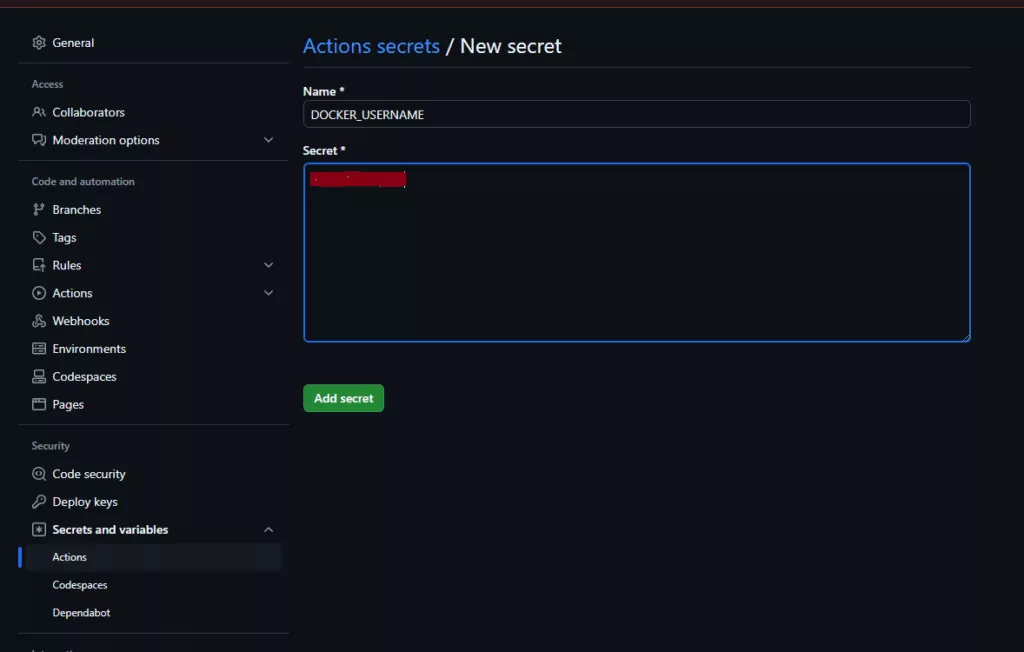
- Add the following secrets:
DOCKER_USERNAME: Your Docker Hub usernameDOCKER_PASSWORD: Paste the access token from Docker Hub.
Step 2: Create a GitHub Actions Workflow
-
Step 1: Create the Workflow Directory Locally
- Open Your Project in VS Code:
- Open the
my-docker-appfolder in VS Code.
- Open the
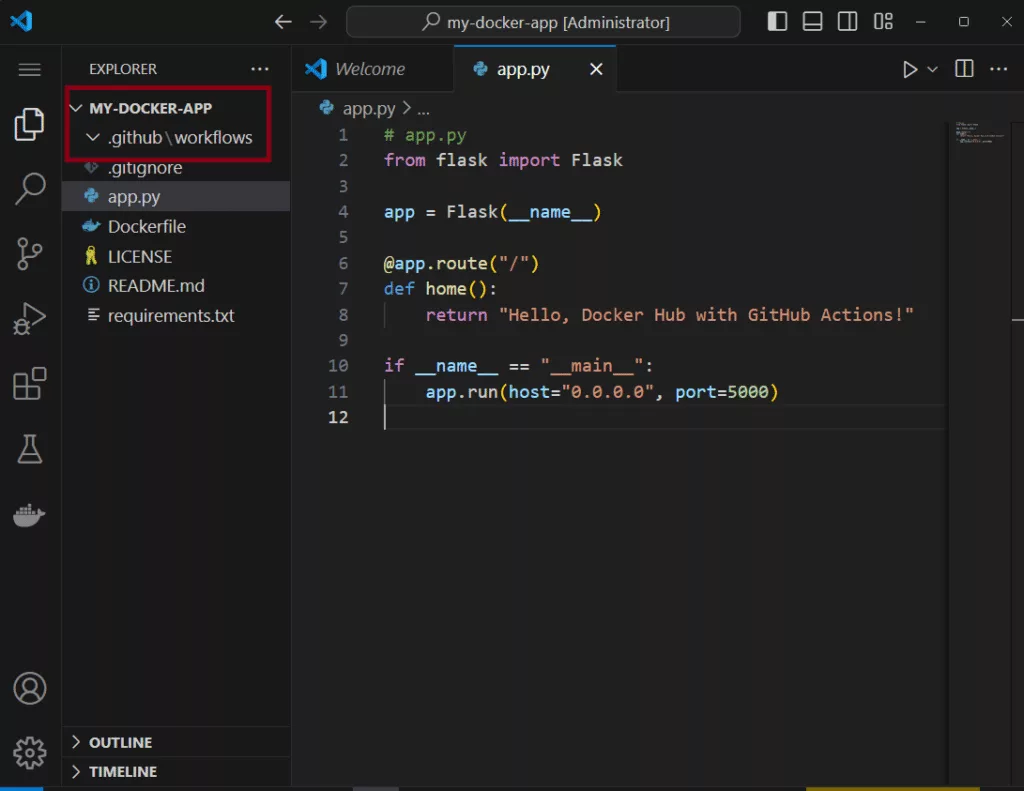
- Create the Workflow Directory:
- Inside the
my-docker-appfolder, create a new folder named.github. - Inside the
.githubfolder, create another folder namedworkflows.
- Inside the
Step 2: Create the Workflow File
- Create the File:
- Inside the
workflowsfolder, create a new file nameddocker-publish.yml.
- Inside the
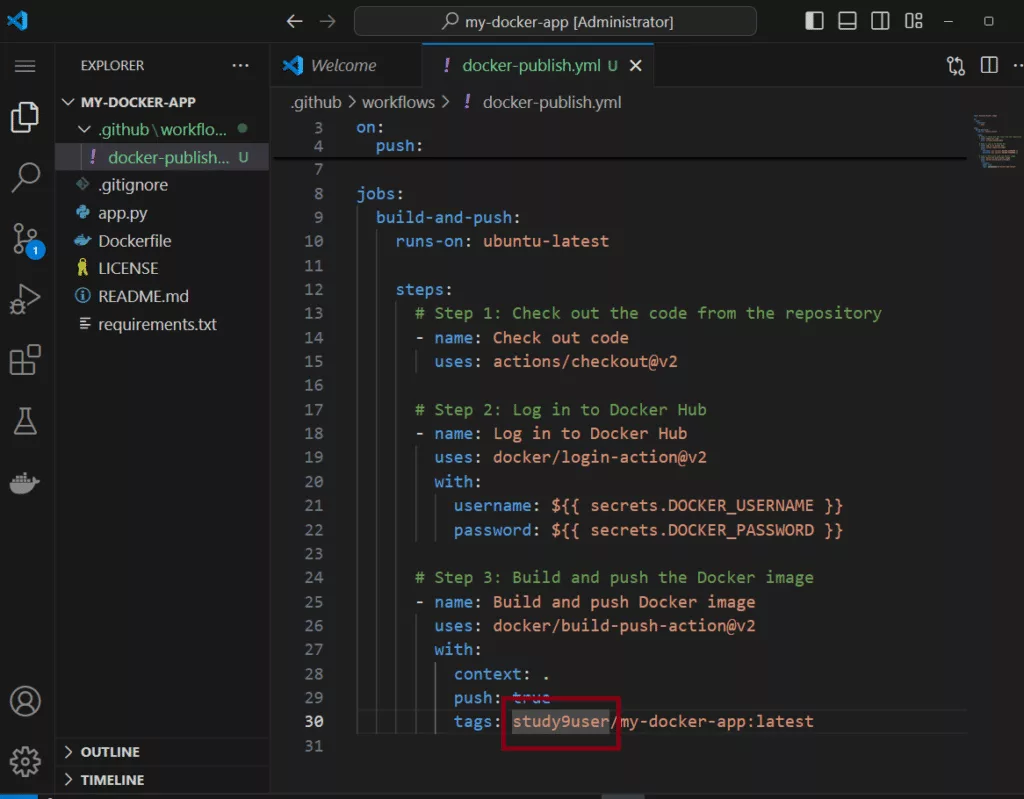
- Add Workflow Content:
- Open the
docker-publish.ymlfile in VS Code and paste the following: - Replace
your_dockerhub_usernamewith your Docker Hub username.
- Open the
Step 3: Push the Workflow File to GitHub
- Stage the Workflow File:
- Open your terminal (or PowerShell) and navigate to the project directory:
cd path/to/my-docker-app - Stage the new
.github/workflows/docker-publish.ymlfile:git add .github/workflows/docker-publish.yml
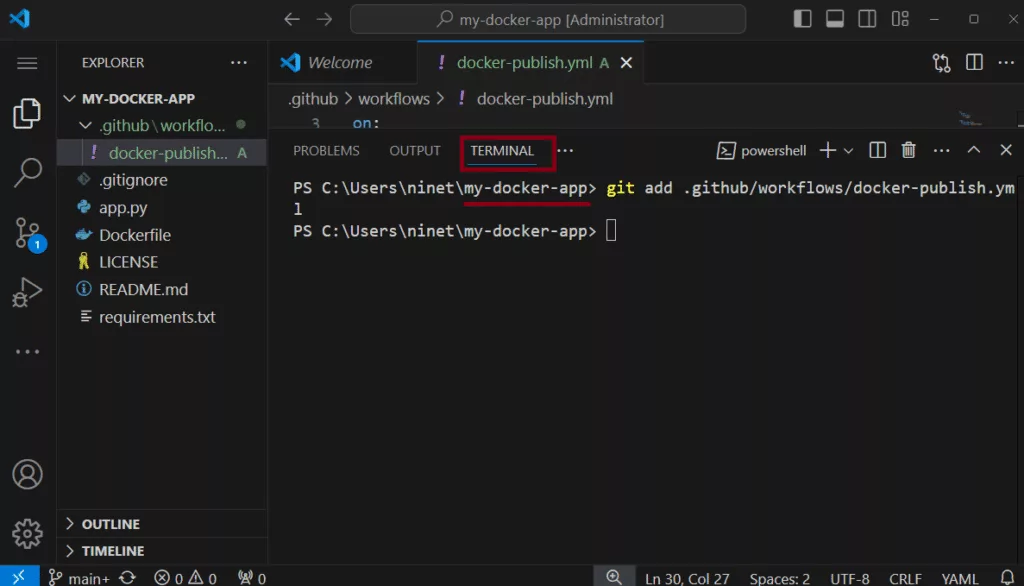
- Open your terminal (or PowerShell) and navigate to the project directory:
- Commit the Changes:
- Commit the file with a meaningful message:
git commit -m "Add GitHub Actions workflow for Docker Hub"
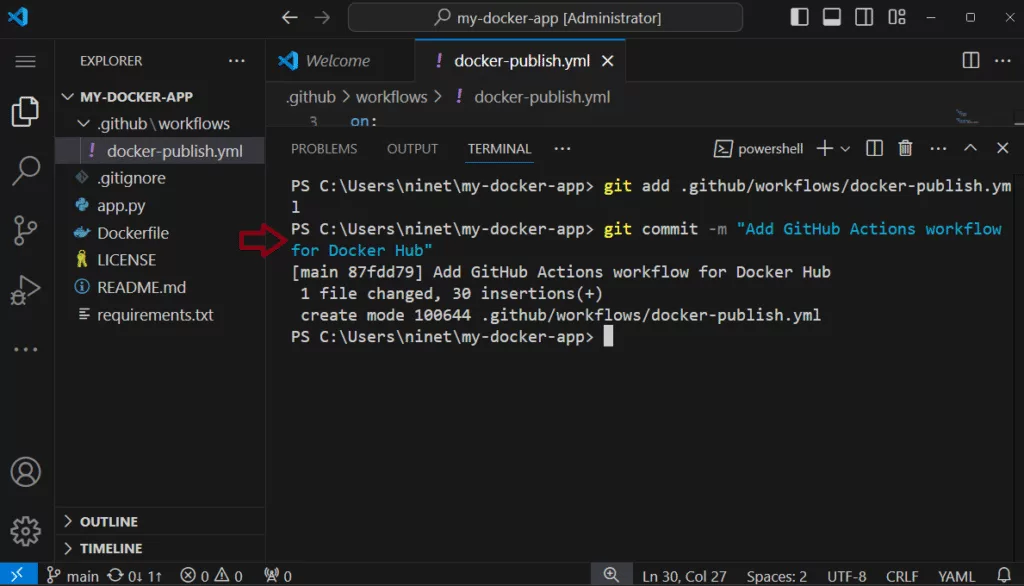
- Commit the file with a meaningful message:
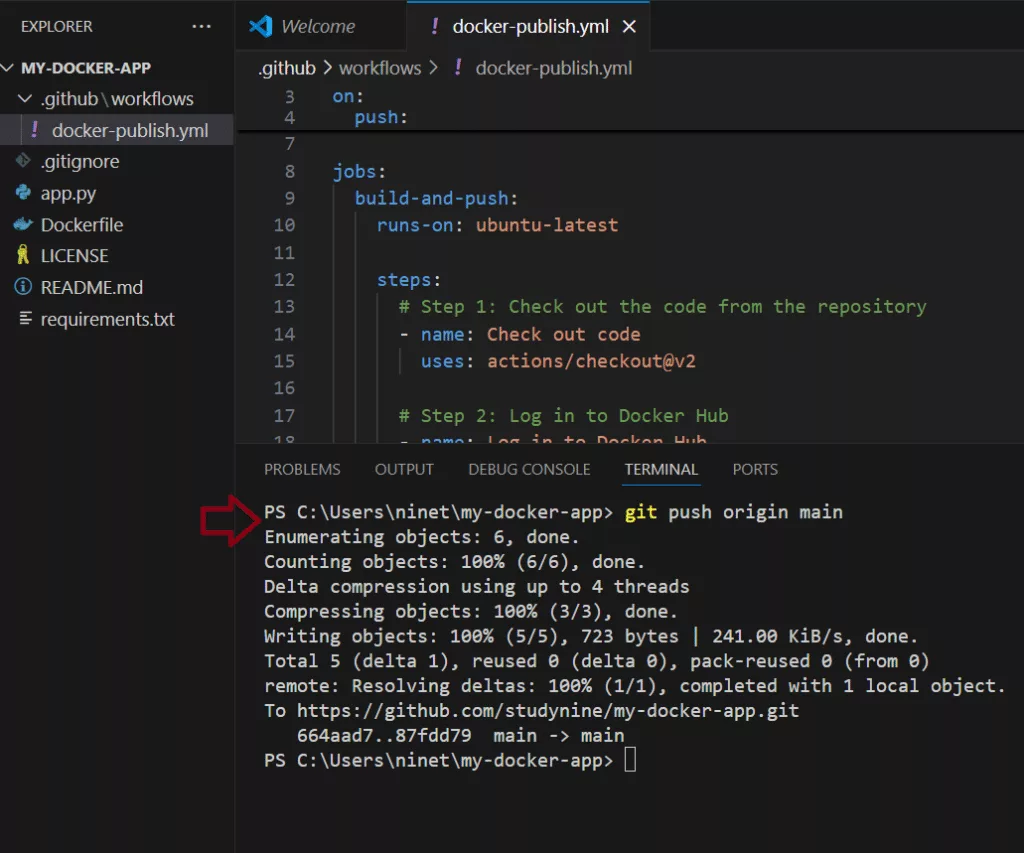
- Push to GitHub:
- Push the changes to the
mainbranch:
- Push the changes to the
- Open Your Project in VS Code:
-
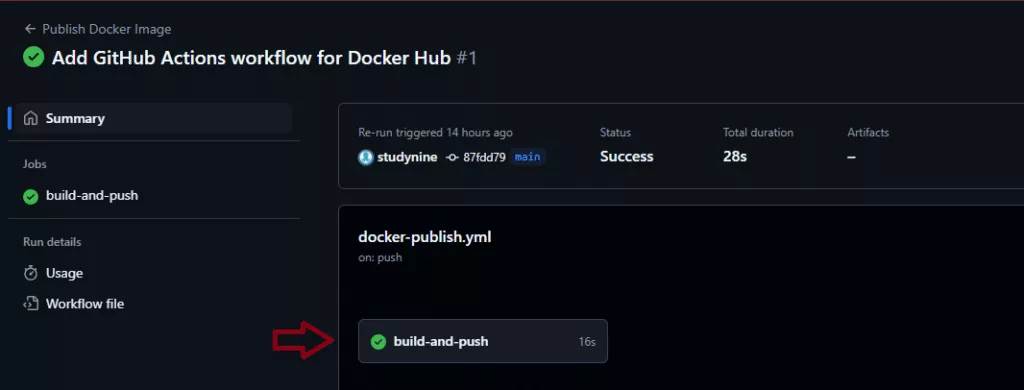
Step 4: Verify on GitHub
- Go to the Actions Tab:
- Open your GitHub repository in your browser.
- Navigate to the Actions tab.
- You should see the workflow
Publish Docker Imagelisted.
- Go to the Actions Tab:
-

-
-
- Trigger the Workflow:
- Make any change to your
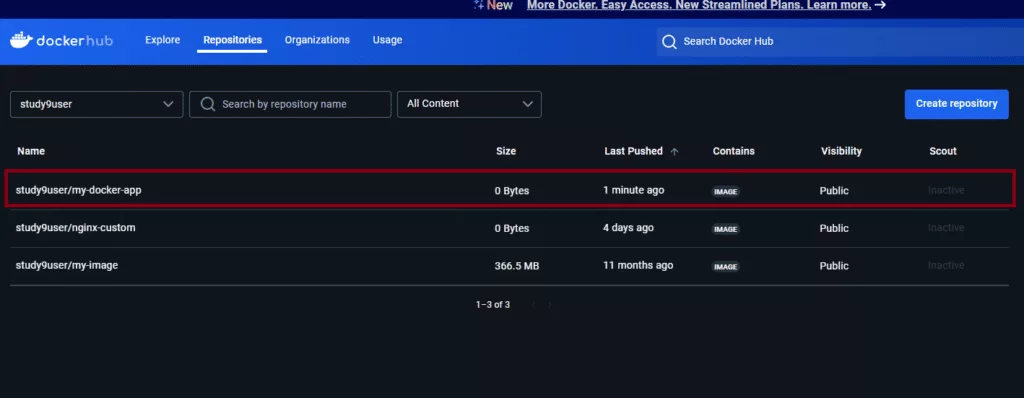
mainbranch (e.g., update a file, commit, and push). - This will trigger the workflow, and GitHub Actions will build and push your Docker image to Docker Hub.
- To demonstrate that Docker Hub is getting updated every time you update the
mainbranch in your GitHub repository, follow these steps:Make a small change in your code:- For example, update the
homeroute inapp.py:
- For example, update the
- Make any change to your
- Trigger the Workflow:
-
- Commit and push the change:

Conclusion
Docker Hub is a powerful tool in the DevOps toolkit, enabling easy access to a vast library of images and simplifying the sharing and management of containerized applications. This quickstart guide has introduced you to the basics of Docker Hub—from pulling images to pushing custom images and integrating it with CI/CD pipelines. With these skills, you’re ready to start incorporating Docker Hub into your projects!
What’s Next?
- Explore the full project code and workflow configuration in my GitHub repository:
GitHub Repository: my-docker-app - Clone the repository and experiment with updates to see how Docker Hub automatically reflects the changes.
