In this blog, we’ll walk through the process of setting up a Continuous Integration (CI) and Continuous Deployment (CD) pipeline for a Python Flask application using GitHub Actions. GitHub Actions allows you to automate workflows directly in your GitHub repository.
What is GitHub Actions?
-
- GitHub Actions is a feature provided by GitHub that enables you to automate workflows directly within your GitHub repository.
- It allows you to define custom workflows using YAML syntax, which are triggered by events like code pushes, pull requests, or other repository activities.
By setting up CI/CD pipeline with GitHub Actions, you ensure that your Flask application undergoes automated testing and, if successful, is automatically deployed . With triggers set on each GitHub repository push, the pipeline performs tasks like building Docker images, running tests, and deploying to Docker Hub upon successful tests
Uploading your Flask app along with the Dockerfile to GitHub :
Follow these steps:
- Create a GitHub Account: If you don’t have a GitHub account, create one at GitHub. Follow this tutorial for more information [link]
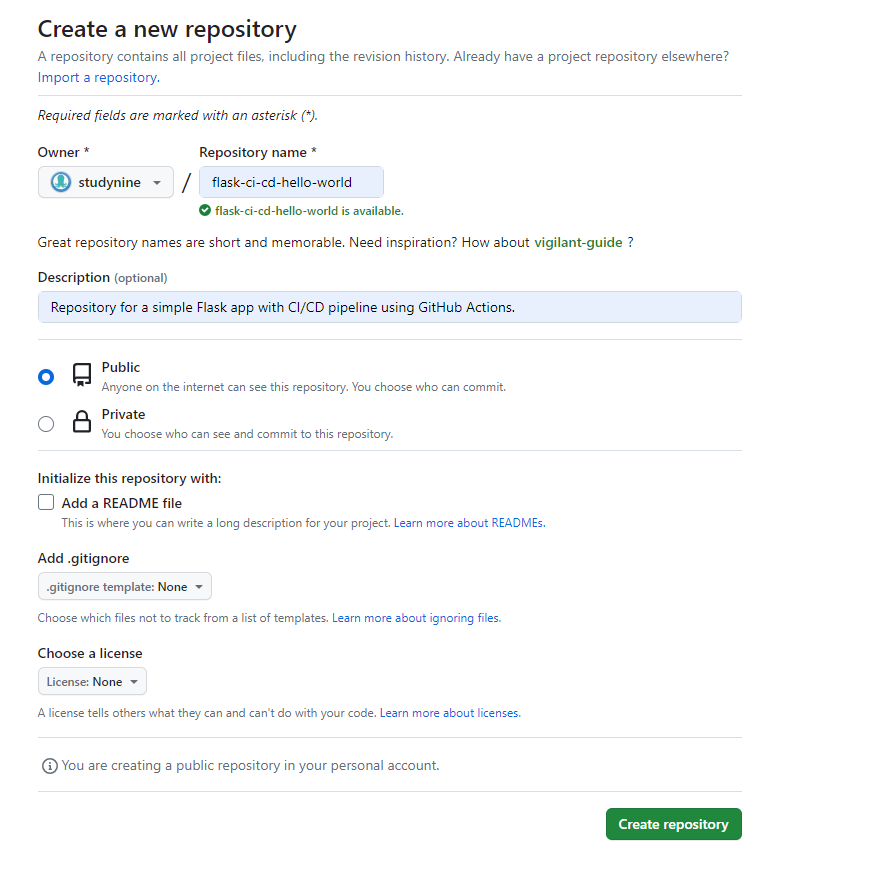
- Create a New Repository:
- Log in to your GitHub account.
- Click on the “+” sign in the top right corner and choose “New repository.”
- Fill in the repository name and description and click on create .
Initialize a Git Repository Locally
In your project directory:
git init
git add .
git commit -m "Initial commit"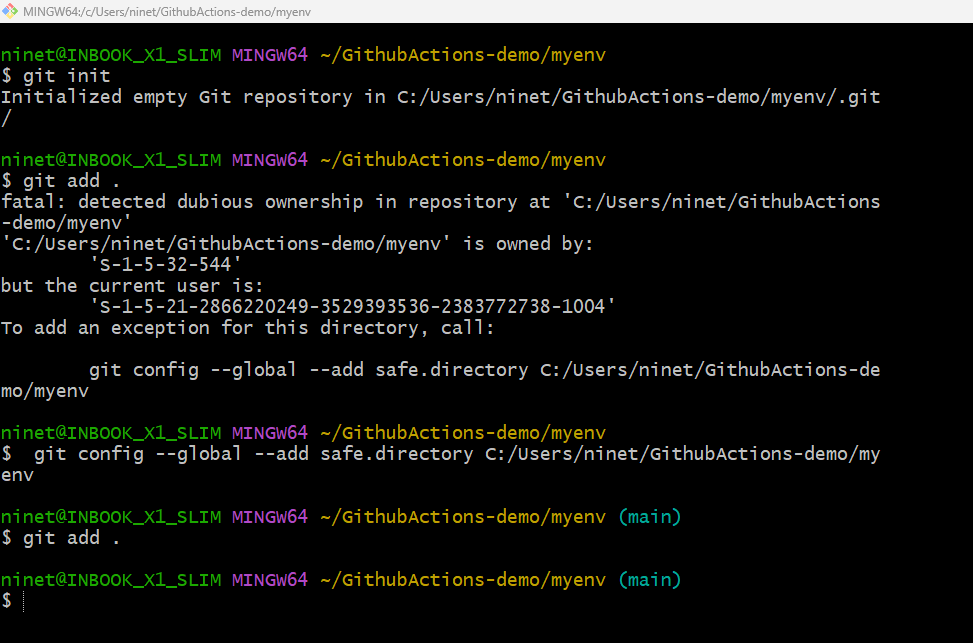
If you see this error(like in screenshot) it’s indicating an issue with file ownership, and it’s suggesting a workaround using the git config command. The error suggests that the ownership of the files in your repository is different from the current user.
You can follow the suggestion provided – After running this command[git config –global –add safe.directory(directory name)], you should be able to proceed with the git add . command without encountering the ownership error.
Now run git commit to create a new commit with a commit message. The -m flag allows you to specify the commit message directly from the command line.
Link to the Remote Repository
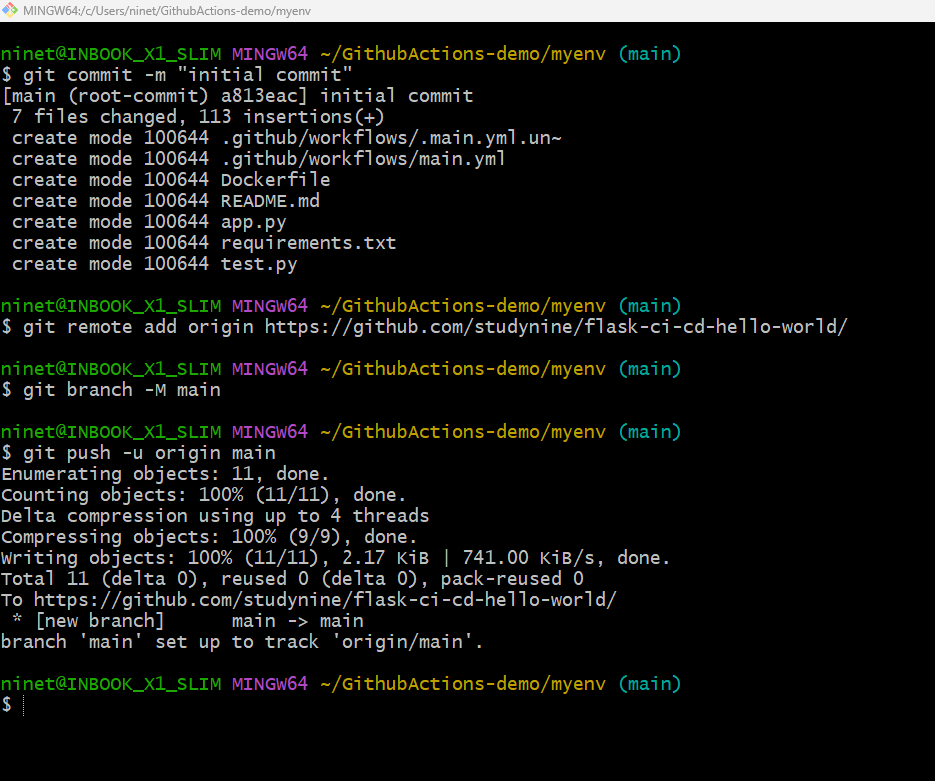
Copy the URL of your GitHub repository and run: (follow above screenshot )
git remote add origin <repository_url>
git branch -M main
git push -u origin main
Link of Repository for CICD (Github Actions) Project :- https://github.com/studynine/flask-ci-cd-hello-world
GitHub Actions Workflow
Step 1: Update GitHub Actions Workflow File (main.yml)
- The CI/CD pipeline ensures that all these steps are automated. It’s a set of workflows and jobs defined in the
.github/workflows/main.ymlfile. - The pipeline is triggered on every push to the
mainbranch, and it runs the specified jobs sequentially.
Add steps to build and push the Docker image, and run the tests. Update the existing workflow file:

Now let’s break down the GitHub Actions workflow line by line.
1st line defines the name of the workflow (CI/CD Pipeline) and specifies when it should be triggered. In this case, the workflow is triggered on every push to the main branch.
Next you define the jobs that will be executed. The first job is named build, and it will run on the latest version of Ubuntu. The uses keyword specifies the action that should be used in this step, in this case, checking out the repository code using actions/checkout@v2.
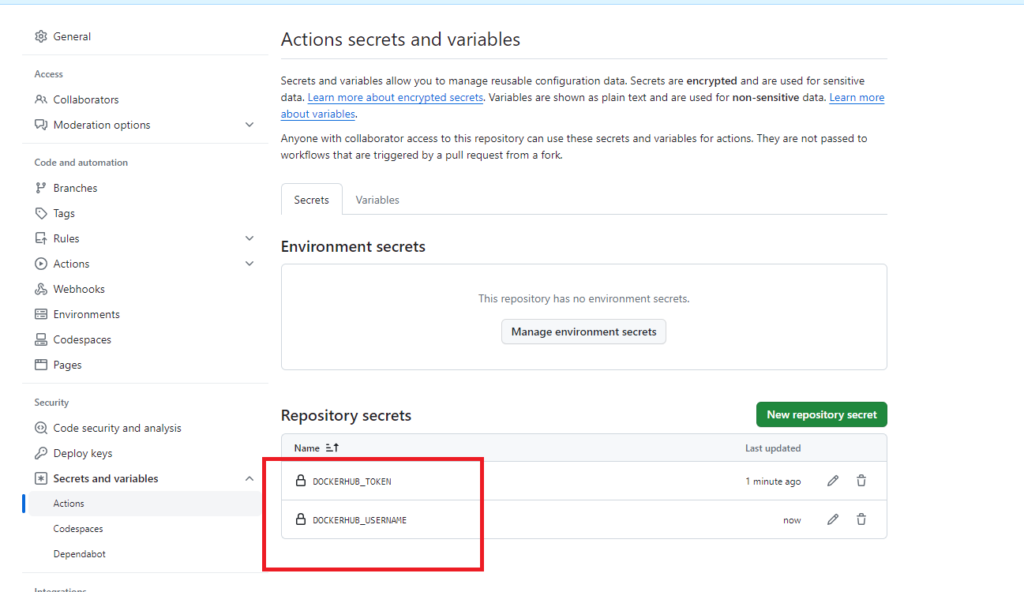
After checking out the repository code , this step logs in to DockerHub using the docker/login-action@v1 action. The DockerHub username and token are stored as secrets (DOCKERHUB_USERNAME and DOCKERHUB_TOKEN) to avoid exposing sensitive information in the workflow file.
Create a Docker Hub Token -> Click on your profile picture in the top right corner -> Select “My Account ” -> In the left sidebar, click on “Security.” -> Click on the “New Access Token” button -> Give your token a name (follow below screenshot) -> Choose the required permissions (e.g., write if you need to push Docker images) -> Click on the “Create” button -> Once the token is created, copy it immediately. This is the only time you’ll see it.

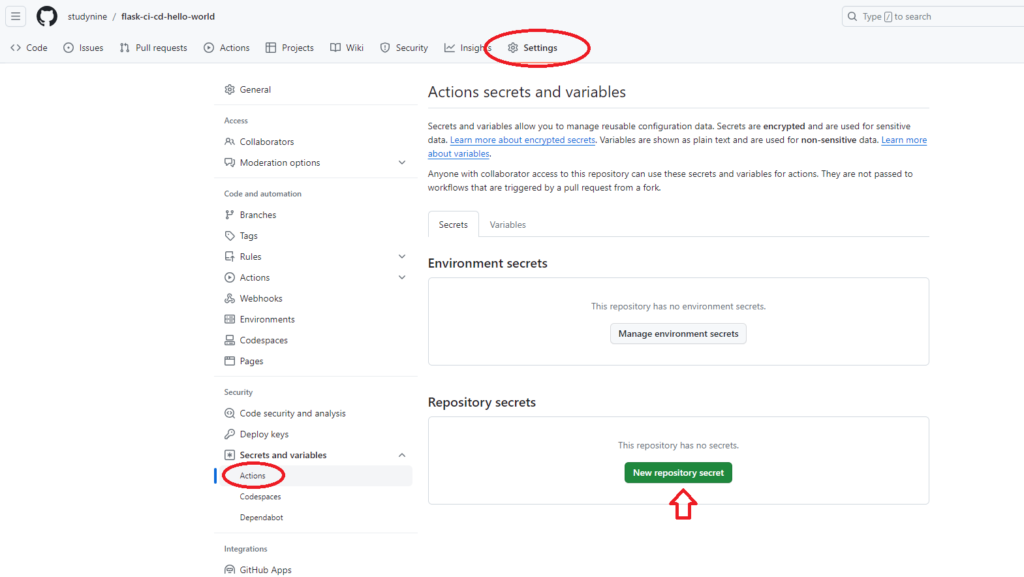
Store Docker Hub Credentials in GitHub -> Click on the “Settings” tab in the repository -> In the left sidebar, click on “Secrets and variables” under security tab -> In actions click on “New repository secret.” -> Enter Secret Details likeDOCKERHUB_USERNAME DOCKERHUB_TOKEN that you copied earlier. (follow below screenshots)
(Back to Github actions pipeline)After login into the DockerHub – in this step it will build a Docker image using the Dockerfile in your repository (docker build -t $DOCKERHUB_USERNAME/$IMAGE_NAME .). It then tags the image and pushes it to DockerHub (docker push $DOCKERHUB_USERNAME/$IMAGE_NAME:latest).

The second job is named test and it also runs on the latest version of Ubuntu. It starts by checking out the code using actions/checkout@v2.
Next step sets up the Python environment with the specified version (3.x).
It installs Python dependencies using pip based on the requirements.txt file.
Finally, installs pytest and runs the tests defined in test.py.
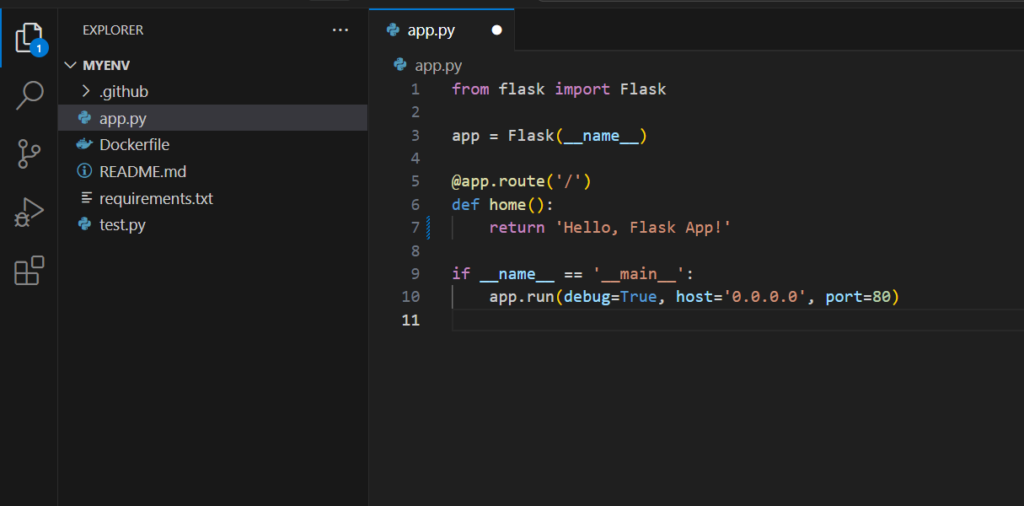
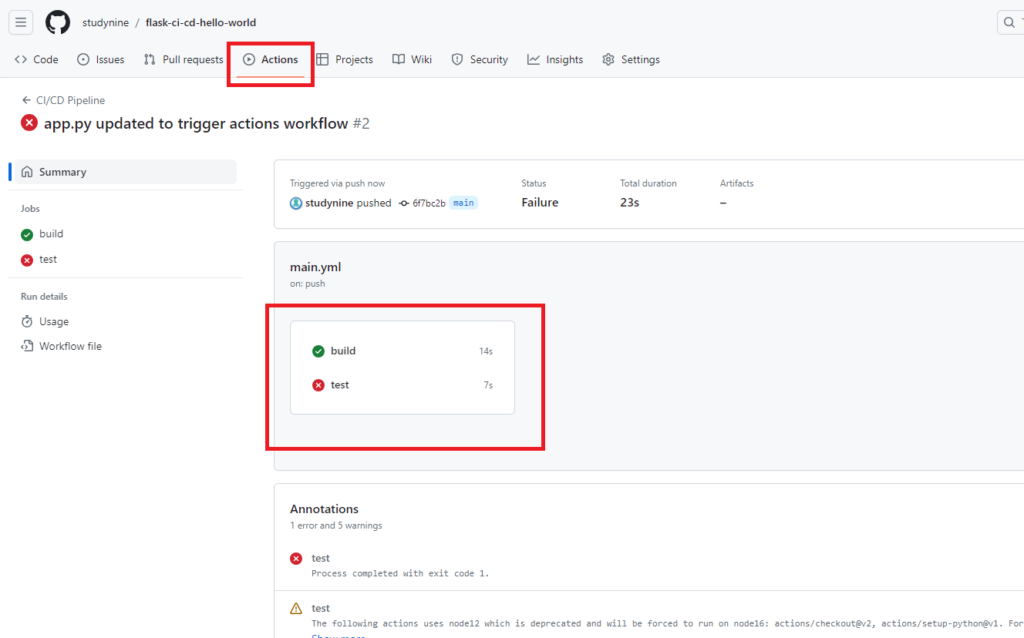
Now I am making a small change in app.py and doing git push. We know pipeline will be triggered automatically whenever there is a push to the main branch.
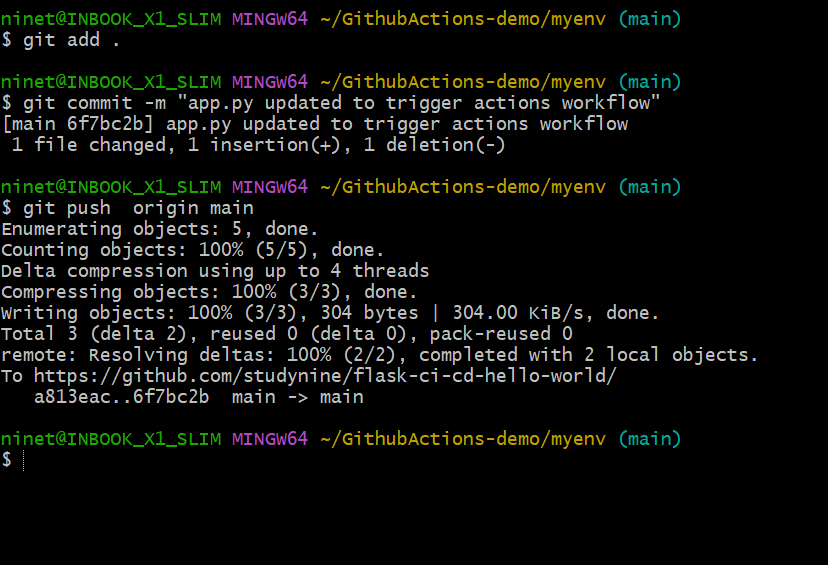
- GitHub Actions Workflow will build the code and then test the code.
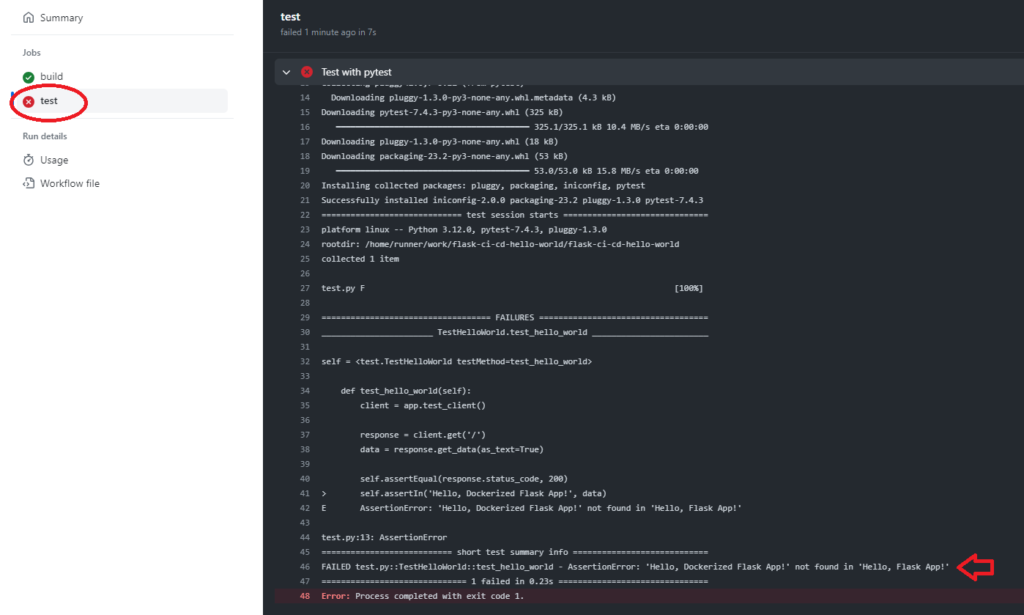
- Test.py is an automated testing file
- It checks whether the message in the application is “Hello, Dockerized Flask App!”
- Finds that the message is not “Hello, Dockerized Flask App!”, the test will fail.
- This failure is detected during the
testjob in the CI/CD pipeline.
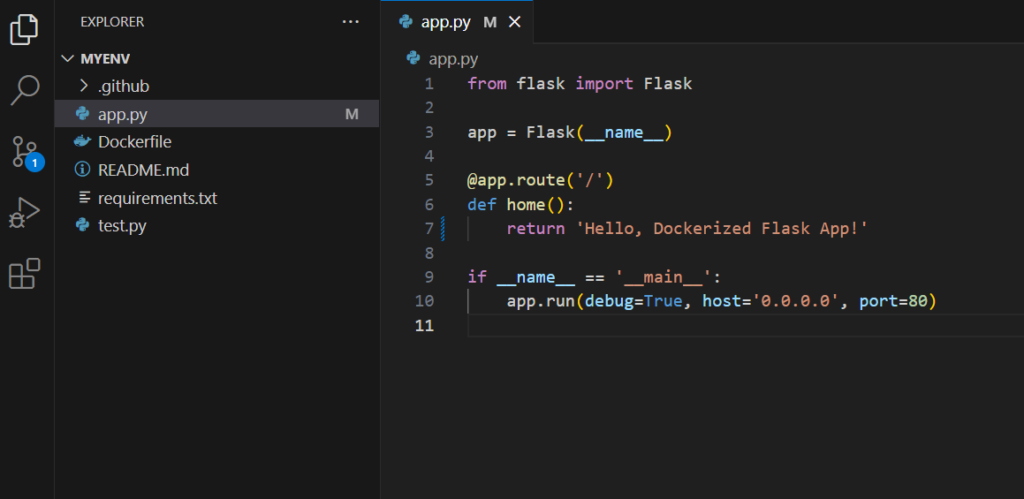
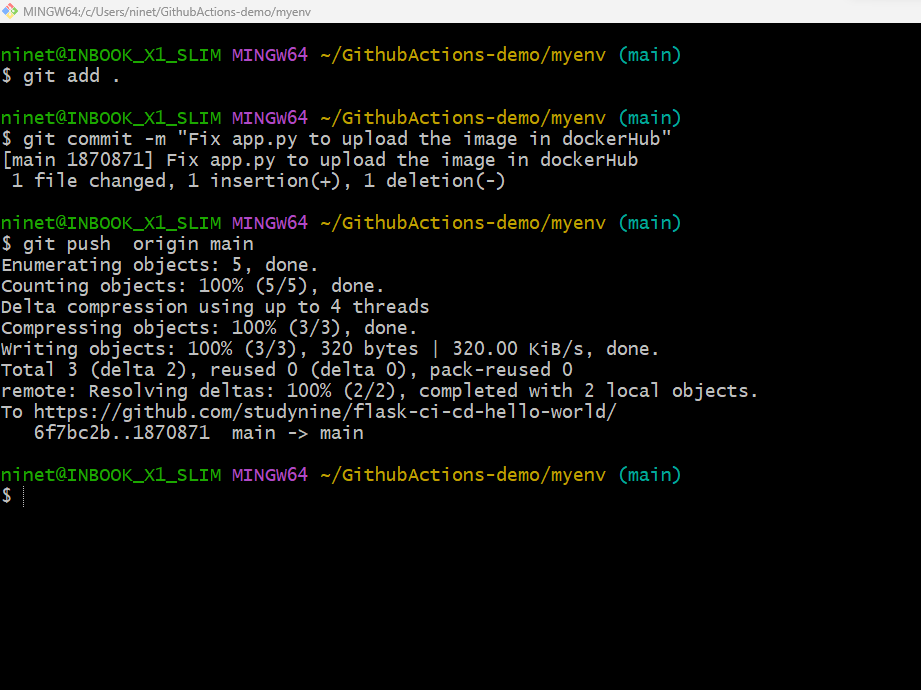
Now this time i am making things all right and doing push again to trigger the pipeline ( i.e. message in app.py “Hello, Dockerized Flask App!” ) which is expected by automated test file. This time it will automatically build and push the image to DockerHub.
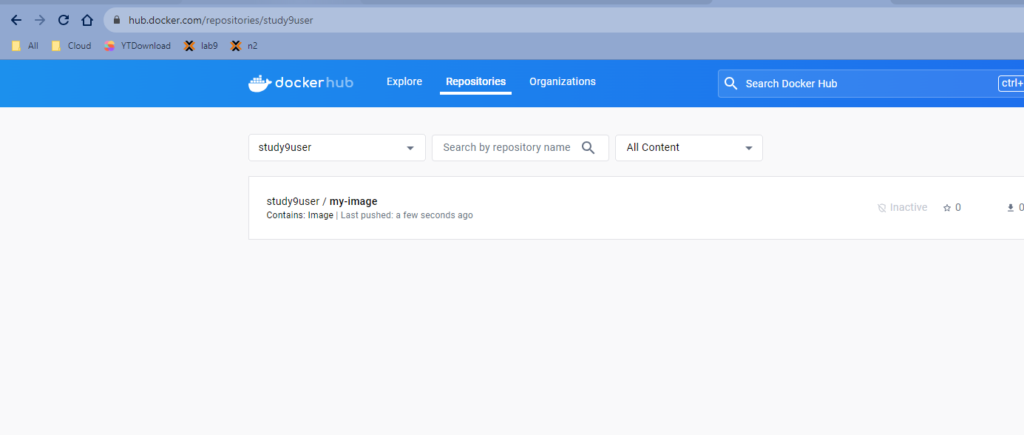
You can see Docker image is pushed automatically to a DockerHub repository under your account. Click on the image and go to public view .
Copy the command docker pull study9user/my-image since your repository is public, anyone can pull the image without authentication.
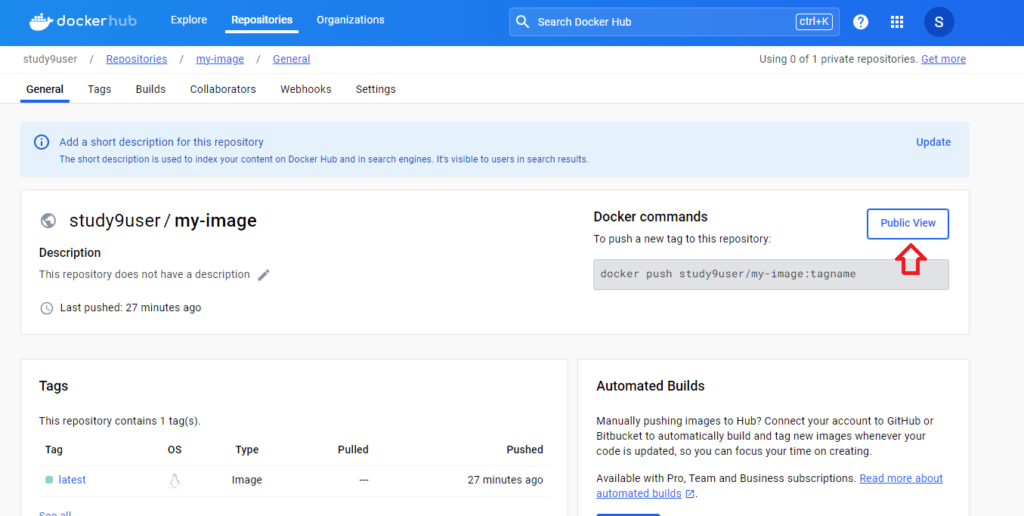
Open a terminal where you want to run the Docker container. Make sure Docker engine is running in your machine
Run the command following screenshot.
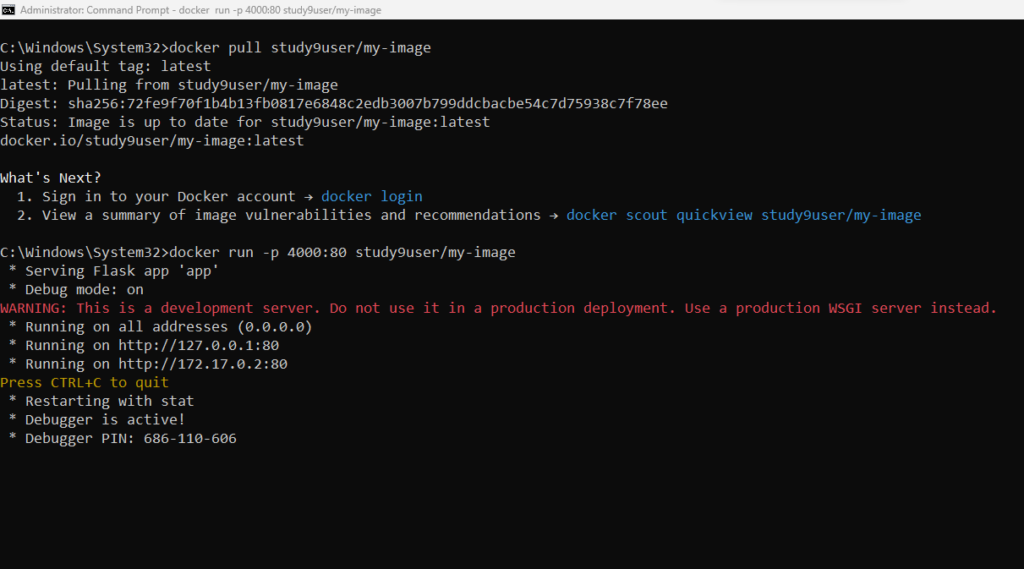
After pulling the image, you can run a container using: docker run -p host-port:container-port your-dockerhub-username/your-image-name [host port : 4000, We have opened container port 80 for public (check your Dockerfile for more details), your-dockerhub-username/your-image : study9user/my-image].
View the Running Application:
- Open a web browser and navigate to
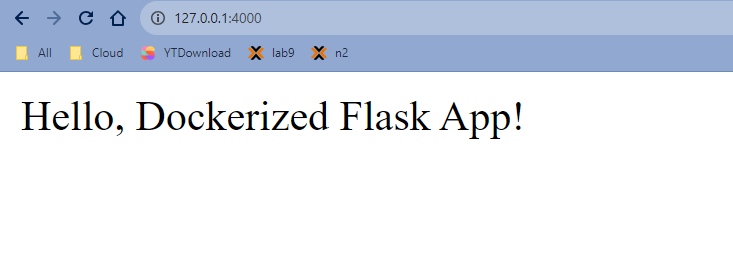
http://localhost:host-port[host port : 4000]
