Dockerizing a Python application involves creating a Docker image that encapsulates your Python code, dependencies, and runtime into a portable container. Below are the detailed steps to Dockerize a Python application:
1. Install Docker
If you haven’t installed Docker yet, you can download and install it from the official Docker website. For more details, you can check-on this blog post on Docker
2. Structure Your Project
Ensure that your Python project has a well-organized structure. At a minimum, you might have a requirements.txt file listing your dependencies and the main Python script or application file(app.py)
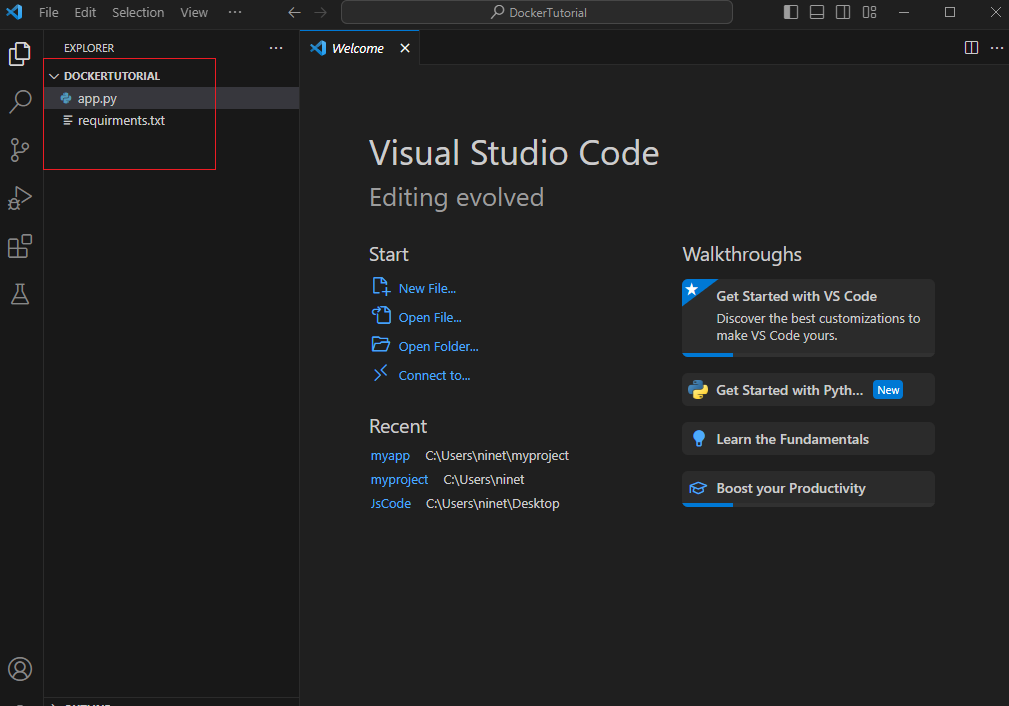
We have created DockerTutorial which is our main project folder . In there we have
app.py – here i will write a simple Python application using Flask framework ,
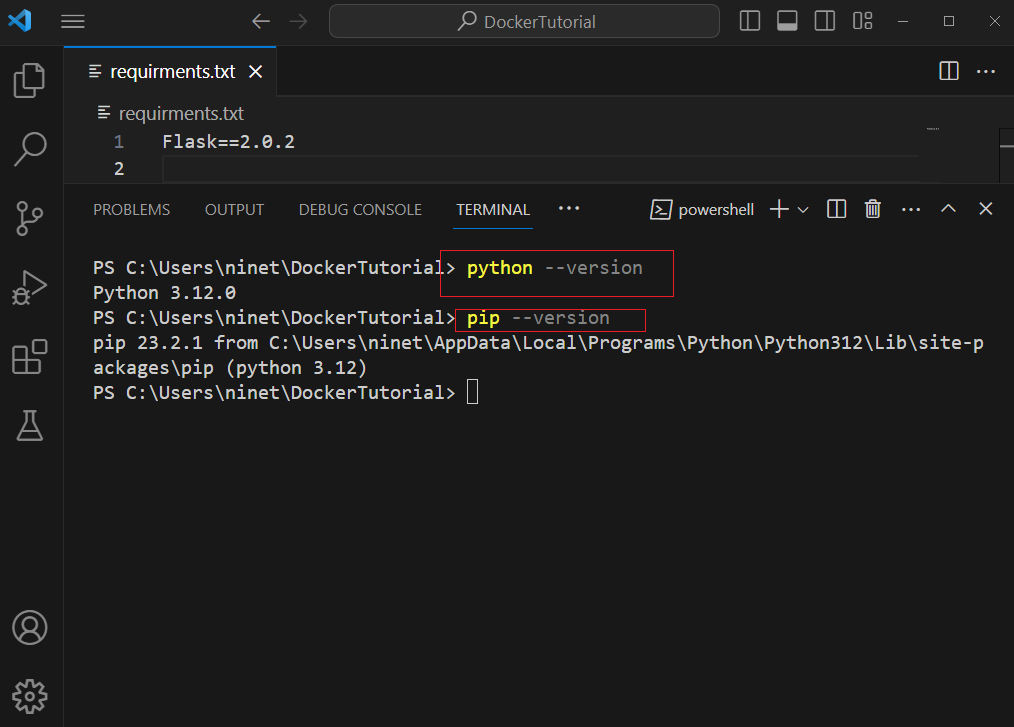
requirements.txt – Lists the Python packages your app depends on. It’s a simple text file where each line contains the name of a package and its version. For example:

The requirements.txt file is often used in combination with tools like pip to install the necessary packages for a project.
Install Flask :
To install Flask for your Python project, you can use the following command:
You typically run this command in your virtual environment (if you have one). The virtual environment keeps your project’s dependencies isolated.
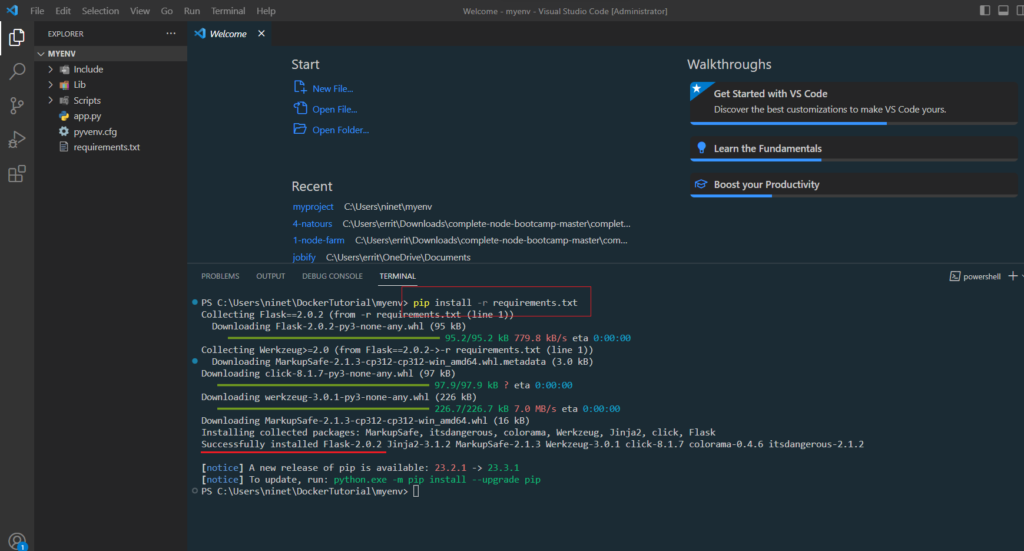
If you’ve defined your dependencies in a requirements.txt file, you can install them using:
Ensure that you are in the correct directory, which is the root directory of your project (in our case, the DockerTutorial directory).
Make sure that you have Python and pip installed on your system.
If you haven’t set up a virtual environment, it’s generally a good practice to do so to avoid conflicts with system-wide packages.
# On Windows
Then activate the virtual environment:
After activating the virtual environment, you can run the pip install commands mentioned earlier.
Please note : Sometimes some issues happen which is specific to power shell in VS Code . So if you’re encountering error suggesting that PowerShell (the default shell in VS Code) is having trouble running the activation script for the virtual environment then open a PowerShell session as Administrator and run.
There is a security feature called “Execution Policy” that might prevent the activation script from running . Else use Command Prompt . Activate the virtual environment using Command Prompt.
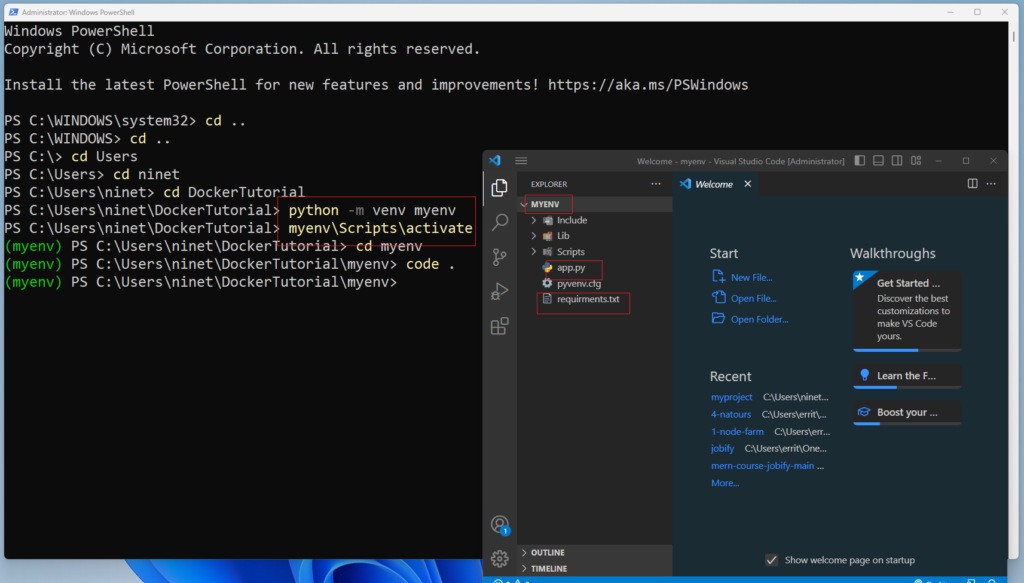
Here i’ve opened PowerShell in admin mode and activated myenv . Then i have opened vs code from inside myenv. So myenv is my root directory now. I have copied app.py and requirements.txt in myenv.
Now run pip install -r requirements.txt because we’ve already defined our dependencies in a requirements.txt file which is now part of myenv direatory.
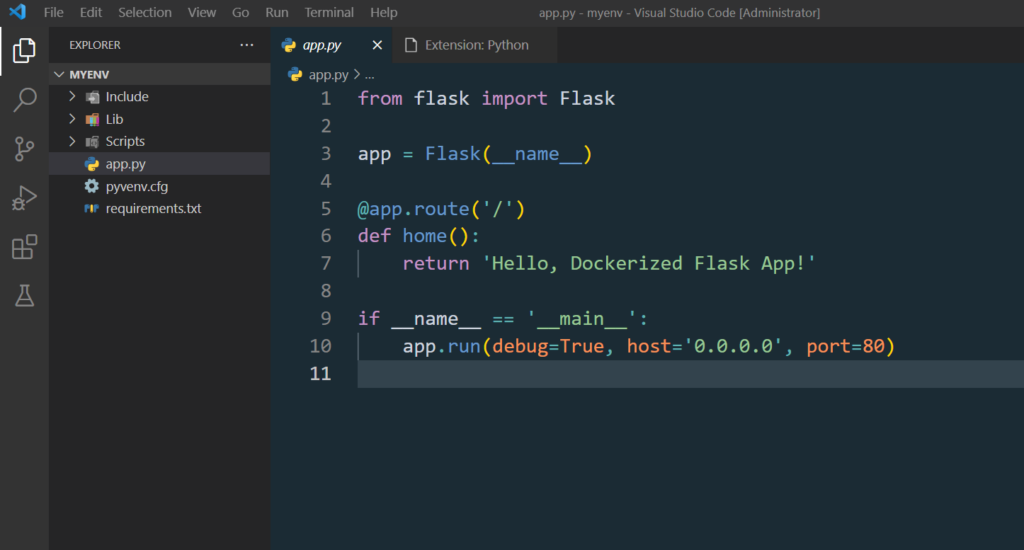
app.py (Your Flask Application)
Now let us write a basic Flask web application with a single route that returns a simple message when accessed .
Write a Dockerfile
Create a Dockerfile in the root of your project. This file contains instructions for building a Docker image.
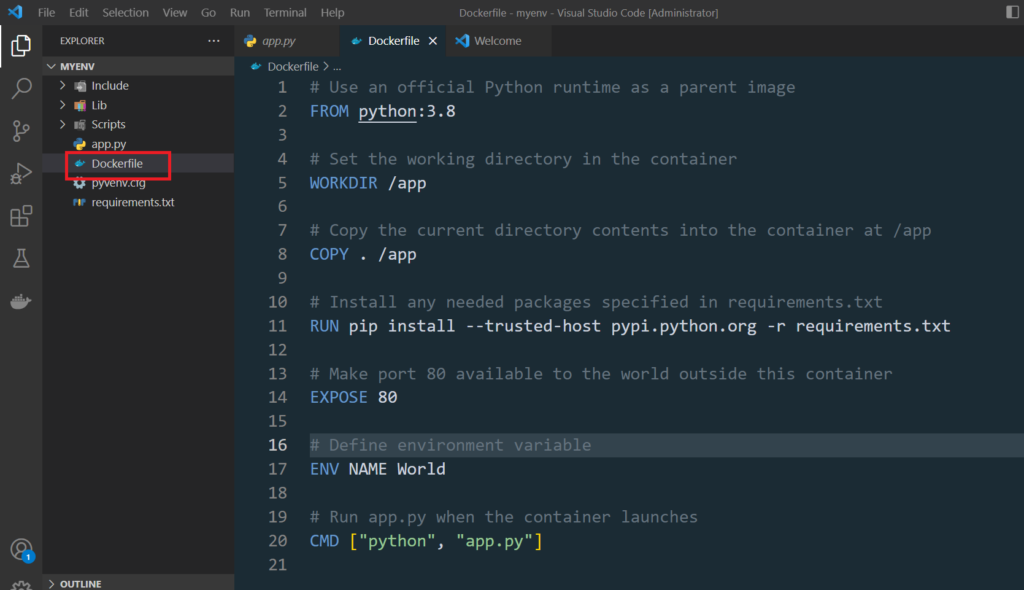
- FROM python:3.8-slim:
- Specifies the base image to use for this build. In this case, it’s an official Python image based on the 3.8 version.
- WORKDIR /app:
- Sets the working directory inside the container to
/app. This is where the subsequent commands will be executed.
- Sets the working directory inside the container to
- COPY . /app:
- Copies the current directory (the entire application code) into the container at
/app.
- Copies the current directory (the entire application code) into the container at
- RUN pip install –trusted-host pypi.python.org -r requirements.txt:
- Installs the dependencies listed in
requirements.txtusing pip. The--trusted-hostflag is used to specify the trusted PyPI server.
- Installs the dependencies listed in
- EXPOSE 80:
- Informs Docker that the container will listen on port 80 at runtime. This does not actually publish the port; it functions as a documentation mechanism.
- ENV NAME World:
- Sets an environment variable
NAMEwith the value “World”. This variable can be accessed within the Docker container.
- Sets an environment variable
- CMD [“python”, “app.py”]:
- Specifies the default command to run when the container starts. In this case, it runs the
app.pyscript using the Python interpreter.
- Specifies the default command to run when the container starts. In this case, it runs the
Docker Installation:
- Install Docker: Make sure Docker is installed on your machine. For more information you can check-out this tutorial on Docker
- Restart VS Code: After installing Docker, close and restart VS Code. This ensures that any changes to the system PATH take effect.
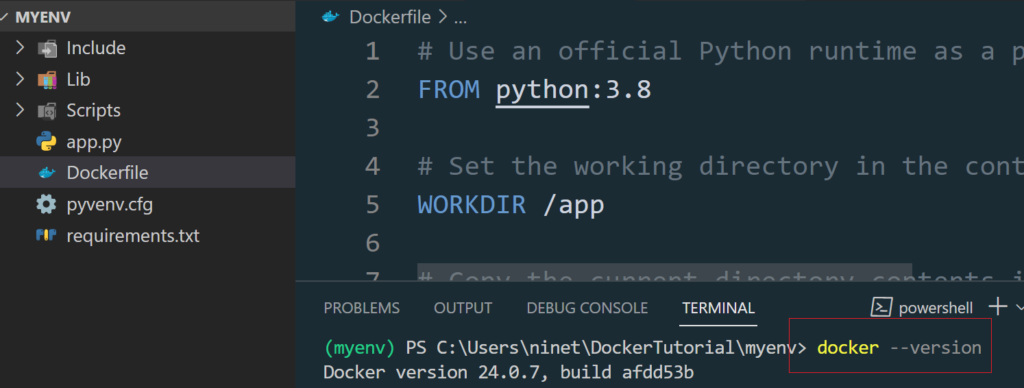
- Check Docker Installation: Open a new terminal in VS Code and run the following command to check if Docker is installed and accessible:
-
docker –version
-
- If Docker is installed correctly, you should see version information.
- Check Docker Desktop:
- Ensure that Docker Desktop is installed on your machine.
- Launch Docker Desktop from your start menu.
- Run as Administrator:
- Close any running instances of VS Code or the terminal.
- Open a new terminal as an administrator. Right-click on your terminal icon and select “Run as Administrator.”
- Restart Docker Desktop:
- If Docker Desktop is already running, try restarting it.
- Right-click on the Docker icon in the system tray and select “Restart.”
- Check Docker Daemon Status:
- Open a command prompt or PowerShell as an administrator.
- Run the following command to check the status of the Docker daemon:
- docker info
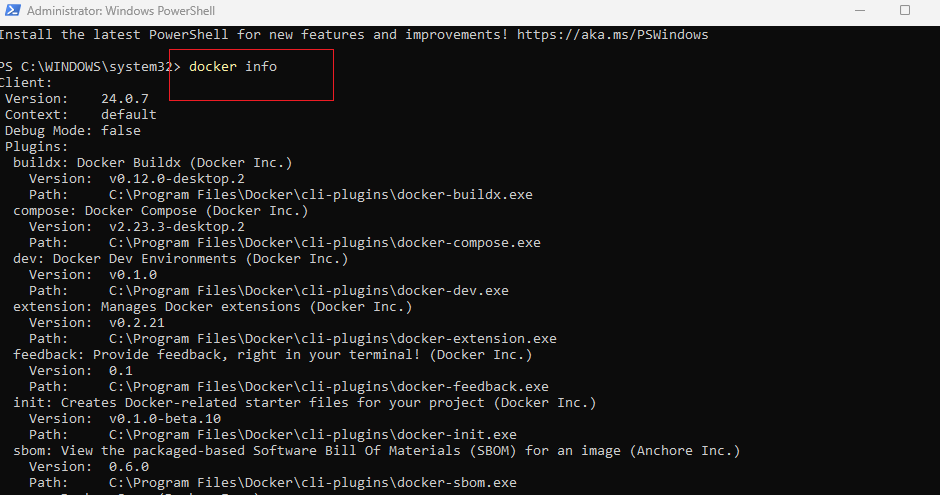
This command should provide information about the Docker daemon if it’s running.
- Build and Run
- Follow the previous steps:
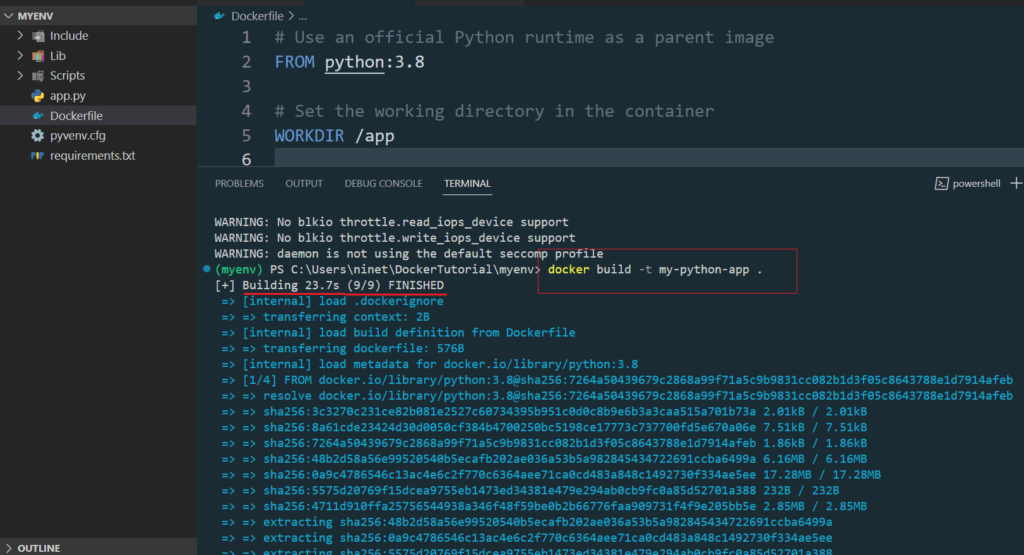
Build the Docker image:
- Reopen Vs code at project root folder myenv and Build the Docker image:
Run the Docker container:
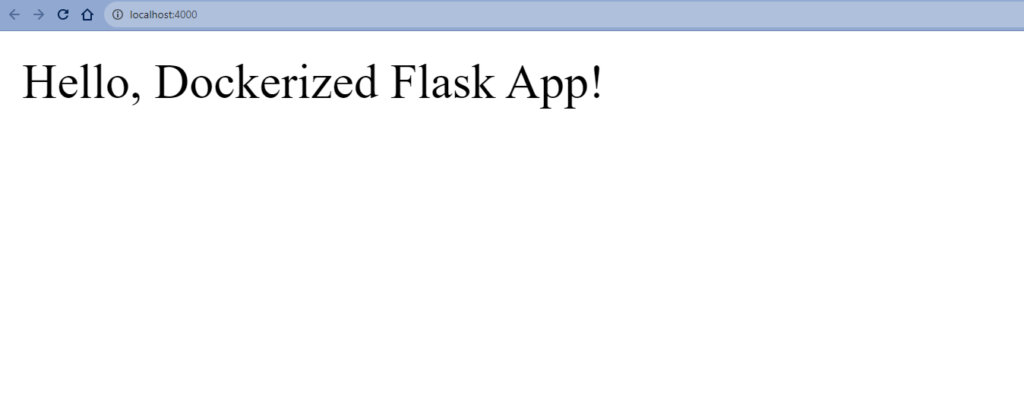
Great! It looks like your Flask application is up and running inside the Docker container. The output indicates that the development server is running on http://127.0.0.1:80, and you can access your Flask app at that address.
Please note : If you are getting any Version Compatibility error , like url_quote function might be deprecated or renamed in the Werkzeug library just Update Your Requirements File (like in screenshot) and rebuild your Docker image.
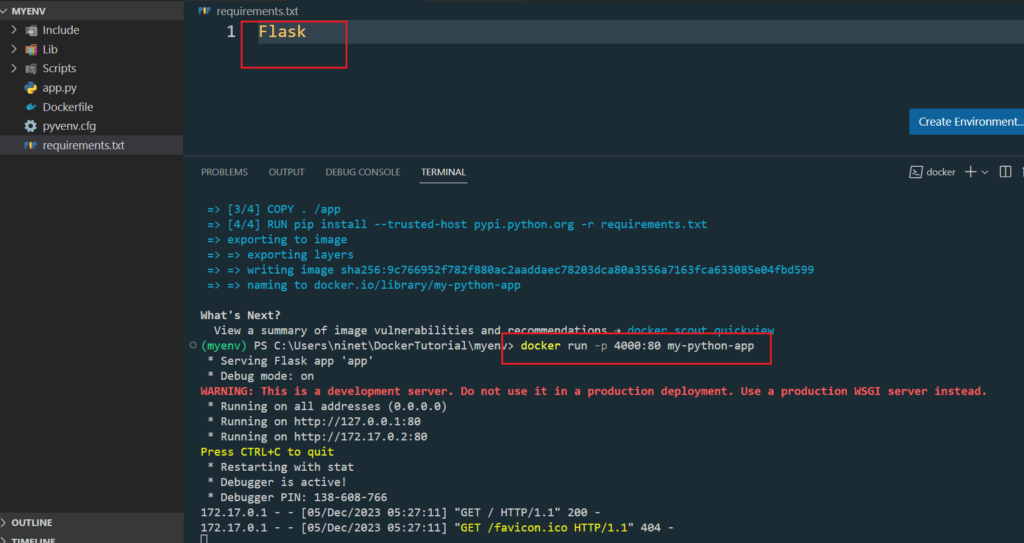
Don’t worry about Development Server Warning – The message just warns that this is a development server and should not be used in a production deployment. For production, consider using a production-ready WSGI server like Gunicorn.
Accessing the App:
-
- You can access your Flask app by visiting http://127.0.0.1:80 in your web browser or using a tool like curl.